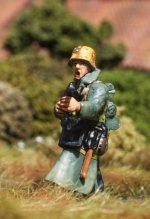
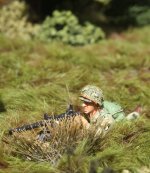
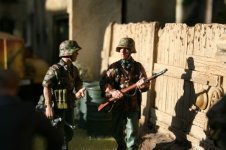
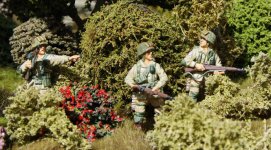
Battle for Arnhem.... (1 Viewer)


We left the XXX Corps story at post #1387 to visit the story of 2 Para, whose story I shall continue again very soon. To continue a brief recap of the overall campaign ....

Early in the day of the 18[SUP]th[/SUP] September, German counterattacks seized one of the 82[SUP]nd[/SUP] landing zones where the Second Lift was scheduled to arrive at 13:00. The 508th Parachute Infantry Regiment attacked at 13:10 and cleared the landing zone by 14:00, capturing 16 German flak pieces and 149 prisoners. Delayed by weather in Britain, the Second Lift did not arrive until 15:30. This lift brought in elements of the 319th and 320th Glider Field Artillery battalions, the 456th Parachute Field Artillery battalion and medical support elements. Twenty minutes later, 135 B-24 bombers dropped supplies from low level.
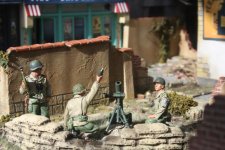
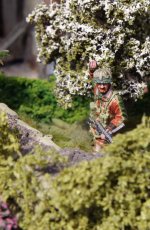
IMG_9284sr.JPG much needed support .....

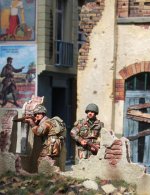
Faced with the loss of the bridge at Son, the 101st unsuccessfully attempted to capture a similar bridge a few kilometres away at Best but found the approach blocked. Other units continued moving to the south and eventually reached the northern end of Eindhoven. At 06:00 hours the Irish Guards Group resumed the advance while facing determined resistance from German infantry and tanks. Around noon the 101st Airborne were met by the lead reconnaissance units from XXX Corps.
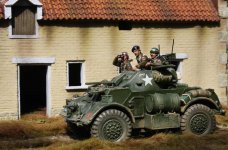
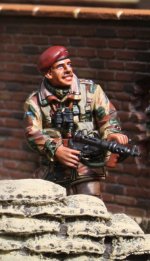
IMG_9515csr.JPG link up .......


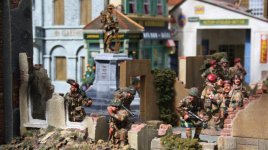
At 16:00 radio contact alerted the main force that the Son bridge had been destroyed and requested that a Bailey bridge be brought forward. By nightfall, the Guards Armored Division had established itself in the Eindhoven area. However, transport columns were jammed in the packed streets of the town, and they were subjected to German aerial bombardment during the night. XXX Corps engineers, supported by German prisoners of war, constructed a class 40 Bailey bridge within 10 hours across the Wilhelmina Canal.
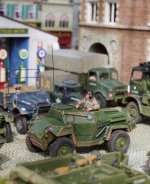
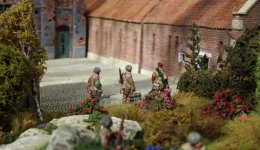
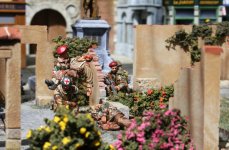
IMGP7604csr.JPG more delay .......


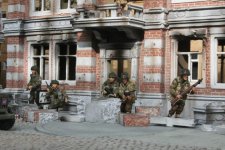
During the day the British VIII and XII Corps, supporting the main attack, had forged bridgeheads across Meuse-Escaut Canal while facing stiff German resistance; the 50th (Northumbrian) Infantry Division was transferred from XXX Corps to VIII Corps, to relieve XXX Corps from having to secure the ground gained thus far. Throughout the day German attacks were launched against XXX Corps and against the newly gained bridgeheads over the Meuse–Escaut Canal, all without success.
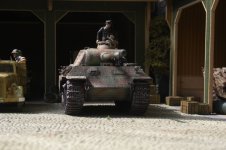
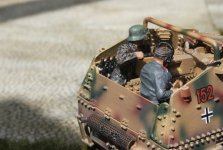
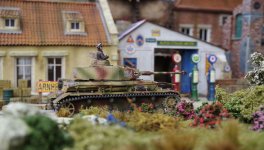
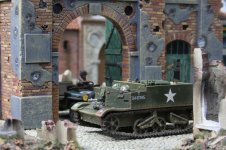
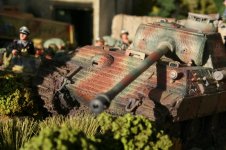
IMG_5808sr.JPG tough opponent ......

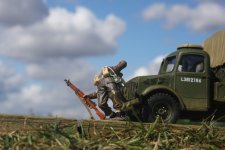
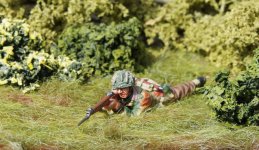
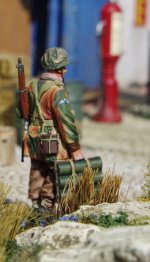
585sr.JPG ambush .....
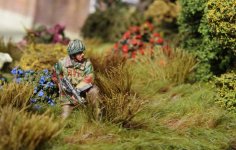
 
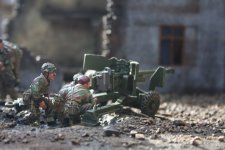
Great looking scenes and appreciate the narrative. Always wanted that mortar crew. Never got it. :rolleyes2: Chris
 

Chris,

Thank you for the likes and kind comments, it is appreciated. Like the other figures the mortar will appear again (and again ...... and again ......)
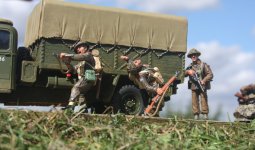
Kevin


........................ With the arrival of Panzer-Kompanie Mielkeon the 19th September 1944, coordinated combined arms attacks could be employed against the British forces at the bridge. AFVs and infantry worked close together and would blast British strong points. Kampfgruppe Knaust would employ everything in their arsenal including small arms, MGs, Panzerfausts and Panzers to remove the ‘Red Devils' from the bridge.
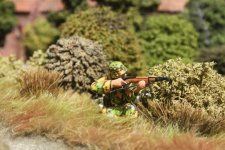
IMG_6702csr.JPG


At 3:00 a.m. on Tuesday 19th, the commanders of the 2[SUP]nd[/SUP] South Staffordshire Battalion and the 1st and 11th Parachute Battalions met to plan their attack to relieve and support Frost. At 4:30 a.m., before dawn, the 1st Parachute Brigade began its attack towards Arnhem Bridge, with the 1st Battalion leading supported by remnants of the 3rd Battalion, with the 2nd South Staffordshires on the 1st Battalion's left flank and the 11th Battalion following.

IMGP7868rcsr.JPG marching towards the bridge


As soon as it became light the 1st Battalion was spotted and halted by fire from the main German defensive line. Trapped in open ground and under heavy fire from three sides, the 1st Battalion disintegrated and what remained of the 3rd Battalion fell back.

IMGP7903csr.JPG pinned down


The 2nd South Staffordshires were similarly cut off and, save for about 150 men, overcome by midday. The 11th Battalion, (which had stayed out of much of the fighting) was then overwhelmed in exposed positions while attempting to capture high ground to the north. With no hope of breaking through, the 500 remaining men of these four battalions withdrew westwards in the direction of the main force, 5 km (3.1 miles) away in Oosterbeek.

IMGP7858csr.JPG pushed away from Arnhem towards Oosterbeek

 
Last edited:

Not until Tuesday midday 19[SUP]th[/SUP] September did the 2[SUP]nd[/SUP] Battalion have any wireless communication with Div. H.Q. or the rest of the Brigade, but they could hear by the noise of the battle that they were having a very sticky time.

IMG_5742csr.JPG

When contact was finally made, 2 Para heard that every effort was being made to reach them,

IMG_5738csr.JPG


1[SUP]st[/SUP] Parachute Brigade had met very heavy opposition soon after leaving the D.Z. and although they fought without a break,

IMGP8174csr.JPG

IMG_5731csr.JPG


they never got more than a footing in the town (Arnhem).

IMG_5739csr.JPG
 
Thanks for the likes, it is appreciated.

Tuesday 19[SUP]th[/SUP] September 1944 brought with it little good news for British 1st Airborne Division. Frost’s men at the bridge were under increasing pressure.

IMG_1723sr.JPG

German air raids, shelling and mortaring from the north and the east cost the airborne troops heavy casualties, but even though ammunition, food and water were all running low, little ground was conceded.

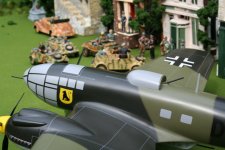
IMG_7568sr.JPG extremely rare wooden K&C Heinkel He III

gnured198 (2).JPG Figarti Stuka zu fuss prepares to barrage

IMG_5081rcsr.JPG Para casualty

XXX Corps were still running late.

394csr.JPG .... but not for lack of effort on their part
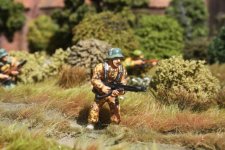
 

Tuesday 19[SUP]th[/SUP] September was a repetition of Monday, with no appreciable worsening of the situation, except for an increase in casualties and a growing shortage of ammunition.
The most serious deficiency was in PIAT bombs,

IMGP8085csr.JPG PIAT gunner

IMGP80851csr.JPG PIAT loader carrying the bomb containers


of which they now had none left, and so had no method of dealing with tanks, which shelled the troops in their houses at very close range.

IMGP8188csr.JPG


The 6 Pdrs still kept the Bridge and Western approaches covered, but could not maintain positions East of the Bridge.

IMG_7545sr.JPG


It was now clear to Frost that he was unlikely to be reinforced by the rest of the division and that his lot was to hold on as long as possible with precious few resources and await the arrival of XXX Corps.


Frost was ceaselessly bombarded by enemy tanks and artillery from two battle groups led by SS Sturmbannführer Brinkmann and one commanded by Major Knaust.

010 (2)csr.JPG Figarti stuka zu fuss

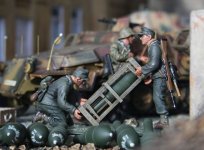
gnured024 (3).JPG loading the launch frames onto the vehicle side

The Germans recognized that they would not be moved by infantry attacks such as those that had been bloodily repulsed on the previous day so instead they heavily shelled the short British perimeter with mortars, artillery and tanks; systematically demolishing each house to enable their infantry to exploit gaps and dislodge the defenders.

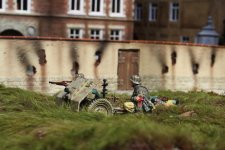
IMG_8326sr.JPG 75mm infantry gun usually found in Infantry Regiment's heavy company (if they had one) - this is manned by Falschirmjager

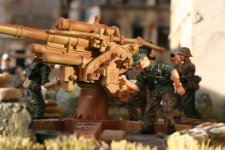
img_40531sr.jpg the ubiquitous 88mm firing into the perimeter


Although in battle against enormous odds, the British clung to their positions and much of the perimeter was held.

IMG_00031sr.JPG
 
In addition, on Tuesday 19[SUP]th[/SUP] September 1944:

1.
Bad weather stopped the Polish Brigade from leaving England. The same weather prevented Allied fighter-bombers from providing close air support to Urquhart’s forces.

IMG_3965rcsr.JPG


2. The attack of 4th Parachute Brigade, supported by another airlanding battalion, the 7[SUP]th[/SUP] King’s Own Scottish Borderers, was halted in the woods north of Oosterbeek.

IMG_5406srx.JPG


IMGP7842csr.JPG


3. The 1[SUP]st[/SUP] Airborne Division was now dependent on airborne supplies dropped by RAF transport squadrons but the Germans quickly reinforced their anti-aircraft defences around the drop zones. The transport crews displayed immense bravery in repeatedly attempting to execute their missions, flying at very low altitude for accuracy through intense anti-aircraft fire.

130 (2)csr.JPG


Flight Lieutenant David Lord was awarded a posthumous Victoria Cross (VC)
for his gallantry as Captain of a Dakota that was shot down during one such mission on 19[SUP]th[/SUP] September 1944.


4.
Various attacks around St Elizabeth’s Hospital by a mixture of units, although releasing Urquhart from his attic to resume command, failed to break through to Frost at Arnhem Bridge.

IMG_6993csr.JPG

These failures resulted in Urquhart pulling the remnants of his division back towards his headquarters at the Hartenstein hotel in Oosterbeek.
 
From http://www.pegasusarchive.org/arnhem/ind2nd_batt.htm

During this period there were some remarkable acts of bravery all over the battlefield, including those of: Lt John Hollington Grayburn (K&C made a dedicated figure)

IMG_5330csr.JPG

IMG_7462sr.JPG


Lt John Hollington Grayburn


Unit : No.2 Platoon, "A" Company, 2nd Parachute BattalionArmy No. : 149002 Awards : Victoria Cross

Jack Grayburn was born on Manora Island, India, in 1918. His father, Lionel "Paddy" Grayburn, a military man who had served with the Yeomanry during the Boer War, worked for Grindleys Bank of India until ill health had compelled him to resign. The family returned to England and settled at Roughwood Farm in Chalfront St. Giles, to the west of London. Jack and both of his brothers, the eldest of whom was awarded the Military Cross during the Second World War, were educated at Sherborne School in Dorset.

He was not an academically inclined pupil, but was a skilled boxer and rugby player. From 1927, Jack Grayburn played for Chiltern Rugby Club during the school holidays and continued to represent them when he left Sherborne in 1936, playing his last game on the 17th April 1939.

It had been intended for Jack to work in Hong Kong with his uncle, Sir "Tubby" Vandeleur Grayburn, then Chief General Manager of the Hong Kong and Shanghai Banking Corporation, however with hostilities looming in the region, his posting was cancelled. When Hong Kong fell to the Japanese, Grayburn's uncle was interned and later executed.

Shortly before the war began, Grayburn joined the Army Cadet Force and his first posting was with the 1st (London) Cadet Force, The Queen's Royal Regiment, but he was later transferred to the Oxfordshire and Buckinghamshire Light Infantry.

In 1942, he met and married Marcelle Chambers, a secretary at the Headquarters staff, with whom he had a son, John. Grayburn, once described as "a belligerent individual", was frustrated by the years of inaction on the home front and so he applied to enter the Parachute Regiment. In early 1943, he was posted to the 7th (Light Infantry) Parachute Battalion, part of the 6th Airborne Division, before joining the 2nd Battalion.
Jack Grayburn commanded No.2 Platoon, who were chosen to spearhead the thrust of A Company, and consequently the 2nd Battalion, to Arnhem Bridge.

Nearing Oosterbeek, No.2 Platoon arrived at a T-Junction and Jack Grayburn seemed to be unclear as to which of the two roads to take. He chose the northern one, but shortly after, the platoon behind him came under loose rifle and mortar fire from the woodland ahead. Grayburn ordered a smokescreen to be laid down while he led a charge to clear the enemy away. The fighting was brief and the Battalion was soon free to press on.


At approximately 8pm, No.2 Platoon reached the northern end of Arnhem bridge, the first troops to do so. With no opposition to speak of, A Company quickly positioned themselves beneath and around the ramp leading to the Bridge, with No.2 Platoon directed onto the embankment itself, its men on either side of the road. Occasional German vehicles passed over the Bridge, directly between No.2 Platoon's positions. However nothing was done to impede them as the Airborne presence at the Bridge was still rather small and so at this stage remaining undetected was more important than challenging harmless targets.


A very small detachment from No.3 Platoon made an attempt to capture the southern end of Arnhem Bridge, but withdrew after a brief exchange of fire. A Company's commander, Major Tatham-Warter, ordered Jack Grayburn's platoon to make a properly coordinated attack while the rest of the Company provided covering fire.
No.2 Platoon, with their faces blackened and boots muffled by strips of curtain, moved across both sides of the Bridge in single file, using the iron sides to camouflage their attack. The extraordinarily high conduct of Lieutenant Jack Grayburn at Arnhem Bridge was noted by Major Tatham-Warter, who, after the Battle, wrote a report which led to Grayburn being promoted to Captain and awarded the Victoria Cross.

His actions are described in the following citation:


Lieutenant Grayburn was a platoon commander of 2nd Battalion The Parachute Regiment which was dropped on 17th September 1944 with the task of seizing and holding the bridge over the Rhine at Arnhem.

The north end of the bridge was captured and, early in the night, Lieutenant Grayburn was ordered to assault and capture the southern end with his platoon. He led his platoon onto the bridge and began the attack with the utmost determination, but the platoon was met by a hail of fire from two 20mm quick firing guns and from machine guns of an armoured car. Almost at once Lieutenant Grayburn was shot through the shoulder.

Although there was no cover on the bridge and in spite of his wounds, Lieutenant Grayburn continued to press forward with the greatest dash and bravery until casualties became so heavy that he was ordered to withdraw. He directed the withdrawal from the bridge personally and was himself the last man to come off the embankment into comparative cover.

Later his platoon was ordered to occupy a house which was vital to the defence of the bridge and he personally organised the occupation of the house.Throughout the next day and night the enemy made ceaseless attacks on the house, using not only infantry with mortars and machine-guns but also tanks and self-propelled guns. The house was very exposed and difficult to defend and the fact that it did not fall to the enemy must be attributed to Lieutenant Grayburn's great courage and inspiring leadership.

He constantly exposed himself to enemy fire while moving among and encouraging his platoon and seemed completely oblivious to danger.
On 19th September the enemy renewed his attacks which increased in intensity as the house was vital to the defence of the bridge. All the attacks were repulsed due to Lieutenant Grayburn's valour and skill in organising and encouraging his men until eventually the house was set on fire and had to be evacuated.

Lieutenant Grayburn took command of elements of all arms, including the remainder of his own company, and reformed them into a fighting force. He spent the night reorganising a defensive position to cover approaches to the bridge.On 20th September he extended his defence by a series of fighting patrols which prevented the enemy from gaining access to the houses in the vicinity, the occupation of which would have prejudiced the defence of the bridge.

This forced the enemy to bring up tanks which brought Lieutenant Grayburn's position under such heavy fire that he was forced to withdraw to an area further north. The enemy now attempted to lay demolition charges under the bridge and the situation was critical. Realising this, Lieutenant Grayburn organised and led a fighting patrol, which drove the enemy off temporarily and gave time for the fuses to be removed. He was again wounded, this time in the back but refused to be evacuated.


Finally, an enemy tank against which Lieutenant Grayburn had no defence, approached so close to his position that it became untenable.
He then stood up in full view of the tank and personally directed the withdrawal of his men to the main defensive perimeter to which he had been ordered.

He was killed that night.
From the evening of 17th September until the night of 20th September, a period of over three days, Lieutenant Grayburn led his men with supreme gallantry and determination. Although in pain and weakened by his wounds, short of food and without sleep, his courage never flagged. There is no doubt that, had it not been for this officer's inspiring leadership and personal bravery, the Arnhem bridge could never have been held for this time.

IMGP8194rcsr.JPG


Jack Grayburn was killed by machine-gun fire from the tank that he had stood in front of. He was buried on the western portion of the grassy area which forms the bridge ramp, close to the underpass, but it was not until 1948 that his remains were discovered and removed to the Airborne Cemetery. After hearing of Jack's death, his wife, Marcelle, returned to her native Scotland where she married again, but her own life was also tragically cut short by Leukaemia. Plaques dedicated to Jack Grayburn's memory can be found in the Parish Church at Chalfront St. Giles, and on the Hong Kong and Shanghai Banking Corporation war memorial in Queen's Street, Hong Kong.
 
With German pressure on 1st Airborne Division increasing and with no sign of the imminent arrival of XXX Corps, Urquhart decided on 20 September to defend a thumb-shaped perimeter at Oosterbeek, with its base on the river.

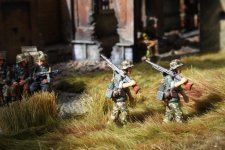
IMGP7892csr.JPG taking cover

IMGP7838csr.JPG grenade attack

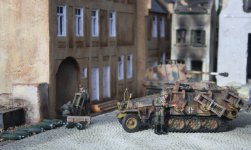
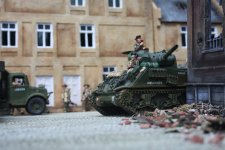
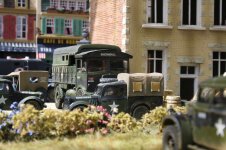
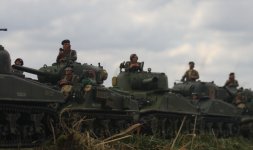
586csr.JPG XXX Corps still under attack on Hell's Highway

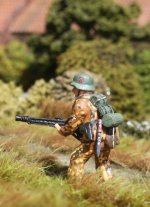
IMG_0550sr.JPG SS soldiers hunting paratroops in the woods

IMG_05611sr.JPG
 
By Wednesday the 20th September, Lt Col Frost's 2 Para forces had shrunk to 150 fighting men out of an original 600.

IMG_5403csr.JPG K&C released this figure of Lt Col Frost

IMG_5404csr.JPG Maj Gough calls in some artillery support

IMG_5645rcsr.JPG the wounded were piling up in fewer houses

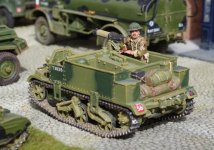
IMG_5747csr.JPG a 2 Para bren carrier


Holding onto a handful of buildings the British put up a resilient fight at the Northern end of the Bridge.

IMGP7607csr.JPG I shall shortly return to XXX Corps, who faced their own challenges
 
To recap, as discussed in more detail in earlier posts, Son Bridge had been blown up in the face of the 506 PIR of the 101[SUP]st[/SUP] Airborne Division. However, they improvised a footbridge and advanced to Eindhoven where they met the Guards on the 18[SUP]th[/SUP] September 1944. A Bailey bridge was built at Son on the night of 18/19 September, but this still meant there was around a 24hr delay in the timetable.

IMGP6915csr.JPG


On the 19[SUP]th[/SUP] the Grenadier Guards pushed north and reached the 82[SUP]nd[/SUP] Airborne at the Grave Bridge, however, as discussed earlier to post #1387, the road was counter attacked behind them by Von Maltzahn’s 107[SUP]th[/SUP] PB.

577sr.JPG

We stopped the story of XXX Corps after describing how the 107[SUP]th[/SUP] PB had temporarily cut the road again on the 20th but had been forced to retreat with significant losses.

274sr.JPG

Nevertheless, these counter attacks would be replicated several times, by whatever ad hoc unit the German command could throw at the road. The 101[SUP]st[/SUP] were stretched so thin that some described it as something akin to the ‘Indian Wars’, with ‘cavalry’ (101[SUP]st[/SUP] with attached XXX Corps tank and artillery support) rushing from one hot spot to another as the Germans found gaps in the overextended road defences.

Major General Maxwell Taylor said, “We were forced to spread along the highway, garrisoning key towns with the hope of being able to move rapidly to meet hostile thrusts before they could become dangerous. When the enemy was close enough to the road to become dangerous to the traffic on it, he had to be fought and destroyed; on the periphery of this vital zone it was a matter of nice judgement to decide how to discourage the enemy from attacking without becoming involved in a serious engagement.”
 
To recap, as discussed in more detail in earlier posts, Son Bridge had been blown up in the face of the 506 PIR of the 101[SUP]st[/SUP] Airborne Division. However, they improvised a footbridge and advanced to Eindhoven where they met the Guards on the 18[SUP]th[/SUP] September 1944. A Bailey bridge was built at Son on the night of 18/19 September, but this still meant there was around a 24hr delay in the timetable.

View attachment 260229


On the 19[SUP]th[/SUP] the Grenadier Guards pushed north and reached the 82[SUP]nd[/SUP] Airborne at the Grave Bridge, however, as discussed earlier to post #1387, the road was counter attacked behind them by Von Maltzahn’s 107[SUP]th[/SUP] PB.

View attachment 260230

We stopped the story of XXX Corps after describing how the 107[SUP]th[/SUP] PB had temporarily cut the road again on the 20th but had been forced to retreat with significant losses.

View attachment 260231

Nevertheless, these counter attacks would be replicated several times, by whatever ad hoc unit the German command could throw at the road. The 101[SUP]st[/SUP] were stretched so thin that some described it as something akin to the ‘Indian Wars’, with ‘cavalry’ (101[SUP]st[/SUP] with attached XXX Corps tank and artillery support) rushing from one hot spot to another as the Germans found gaps in the overextended road defences.

Major General Maxwell Taylor said, “We were forced to spread along the highway, garrisoning key towns with the hope of being able to move rapidly to meet hostile thrusts before they could become dangerous. When the enemy was close enough to the road to become dangerous to the traffic on it, he had to be fought and destroyed; on the periphery of this vital zone it was a matter of nice judgement to decide how to discourage the enemy from attacking without becoming involved in a serious engagement.”

[FONT=&quot]Hello Kevin,[/FONT]
[FONT=&quot]You are to be highly commended for both your extensive knowledge, and ability to recreate and present in King & Country Arnhem ’44 and Market Garden series, the Battle of Oosterbeek/Arnhem, to the extent you have. Over the years my friends have often discussed two categories of collectors, regardless of what they collect, as the “committables and the out-patients”. With all due respect, am afraid that both of us fall into the first category.[/FONT]
[FONT=&quot] [/FONT]
[FONT=&quot]Like yourself have had the good fortune over the years of acquiring the majority of the sets in both series. Being a traditionalist rather than a dioramasist (new word), only have a couple of limited displays in that format; http://arnhemjim.blogspot.com/2011/03/battle-of-arnhem-whos-son-and-heir.html and http://arnhemjim.blogspot.com/2011/03/whats-form-general-mgen-re-urquhart-at.html[/FONT] .

[FONT=&quot]Given both your obvious interest and knowledge of the operation, you might possibly be interested in the perspective I took in a blog page started back in 2011; http://arnhemjim.blogspot.com/p/operation-market-garden.html [/FONT]
[FONT=&quot] [/FONT]
[FONT=&quot]Along with many other of your fans, I will certainly continue to both enjoy and very much admire your presentations. As is still used and signaled in both the American and Royal Navy, “BRAVO ZULU” (Well Done).[/FONT]
[FONT=&quot] [/FONT]
[FONT=&quot]Stay safe, Stay well,[/FONT]
[FONT=&quot]Arnhem Jim[/FONT]
[FONT=&quot]Arizona Territory [/FONT]
 
Hello Kevin,
You are to be highly commended for both your extensive knowledge, and ability to recreate and present in King & Country Arnhem ’44 and Market Garden series, the Battle of Oosterbeek/Arnhem, to the extent you have. Over the years my friends have often discussed two categories of collectors, regardless of what they collect, as the “committables and the out-patients”. With all due respect, am afraid that both of us fall into the first category.

Like yourself have had the good fortune over the years of acquiring the majority of the sets in both series. Being a traditionalist rather than a dioramasist (new word), only have a couple of limited displays in that format; http://arnhemjim.blogspot.com/2011/03/battle-of-arnhem-whos-son-and-heir.html and http://arnhemjim.blogspot.com/2011/03/whats-form-general-mgen-re-urquhart-at.html .

Given both your obvious interest and knowledge of the operation, you might possibly be interested in the perspective I took in a blog page started back in 2011; http://arnhemjim.blogspot.com/p/operation-market-garden.html

Along with many other of your fans, I will certainly continue to both enjoy and very much admire your presentations. As is still used and signaled in both the American and Royal Navy, “BRAVO ZULU” (Well Done).

Stay safe, Stay well,
Arnhem Jim
Arizona Territory

Jim

Thank you for taking the trouble to comment, I appreciate the very kind words. I assure you that I have visited your blogspot before and will do so again.

I find myself in limited circumstances, on 'lockdown' for nearly ten years, so posting on this thread is something to do, when I can. I have always enjoyed photographing the soldiers. The contents of this thread are by no means all from my own collection, but are from several, from both sides of the Atlantic when I was fitter. Commit-able? Maybe? Anyway, I hope that you enjoy.


Ref: http://www.rememberseptember44.com


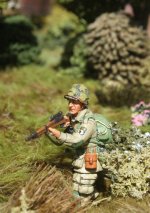
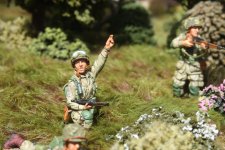
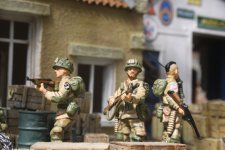
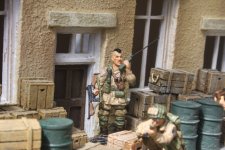
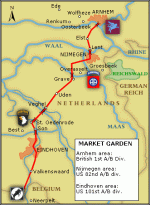
I perhaps now need to briefly rewind to Sunday 17[SUP]th[/SUP] September. The U.S. 101st Airborne Division had to take bridges over


1. the Wilhelmina Canal at Son
2. the Dommel at St-Oedenrode
3. the twin waterways of the Aa and Zuid-Willemsvaart Canal near Veghel


Colonel Howard Johnson’s 501st PIR jumped mainly at Drop Zone 'A', south of the two waterways, near Veghel.

IMG_1023csr.JPG


The 1st Battalion of this regiment jumped at drop zone 'A1', north of the Aa, also near Veghel. However, they landed at the wrong place, near Heeswijk Castle, some 10 kilometers away from the target. Nevertheless, they quickly marched towards Veghel where they arrived at 1700.

IMG_10121sr.JPG


By that time, the rest of the 501st Regiment had captured both bridges intact and set up a strong roadblock south of Veghel near the village of Eerde. Their operation was so far accomplished.

IMG_1010sr.JPG

IMG_1001sr.JPG
 
plan4b.gif Ref: http://www.rememberseptember44.com


The 502nd and 506th Regiment’s drop zones were in the triangle of Son/Best/St-Oedenrode (Landing Zone 'W'). A total of 53 gliders landed as German anti-aircraft guns shot down several gliders.

IMG_9750sr.JPG

The 502nd Regiment, landed at Drop Zone 'B'. They encountered some light resistance at St. Oedenrode, but the bridge across the Dommel was taken intact.

A secondary target of the 502nd Regiment was the bridge near Best. General Sir Miles Dempsey was not interested in Best and was just focussed upon the narrow thrust for 2[SUP]nd[/SUP] Army. General Taylor felt that taking Best would give him two bridges across the Wilhelmina Canal as insurance. Intelligence told Taylor that there were only light garrison forces in the area, so Taylor felt that one company could be spared for the task.

H Company of 3/502 PIR was chosen, with 3[SUP]rd[/SUP] Platoon C Company 326 Engineers and a section of machine guns from Battalion HQ as reinforcements, to take and hold the road and rail bridges. Captain Robert Jones was in command. The flat ground meant it was difficult to follow their reference point for advance to the bridges, so H Co. emerged from cover off course, in open ground around 400m from Best itself, not the bridges, where they came under fire.

IMG_1061csr.JPG

 
Jones was about to overwhelm the small group of defenders when 12 trucks halted their journey and disgorged around 300 infantry from 59[SUP]th[/SUP] Division. They were a different kampfegruppe on their way south.

IMG_5303sr.JPG

The Germans now had the upper hand.

IMG_0582csr.JPG

Meanwhile, Lt Col Cole of 3/502 ordered Jones to send 2[SUP]nd[/SUP] Platoon, his engineers and machine guns to capture the bridges as he did not wish Jones to be deflected away from his mission by being sucked into a battle at Best.

Jones withdrew his remaining two platoons and dug in on the wood lines between Best and the DZ.

IMG_1024csr.JPG

The Germans mounted probing attacks through the night and casualties mounted.

242sr.JPG
 
Maj. John Stopka took command of the 3rd battlion after LTC Cole was KIA. Stopka was killed by friendly fire, P47s.

This is a great series both the visual and the informative text. I look up related topics from your entries. :salute:: Chris
 
Meanwhile, 2[SUP]nd[/SUP] Platoon advanced cautiously along the western edge of Son forest, which was a planted forest of young conifers.

IMGP89301csr.JPG

The German had set up machine guns to fire along firebreaks. Dealing with them or bypassing them took time and darkness fell whilst they were still in the wood. They eventually emerged 1000m from the bridge and closed the distance to a fenced canal dock, that blocked the advance.

IMG_05631csr.JPG

Lt Wierzbowski, in command, lead the group along a catwalk and they made the bank without detection despite their exposed advance. Soon, a firefight broke out between the main body of 2[SUP]nd[/SUP] platoon and Germans across the canal, so Lt Wierzbowski withdrew to the edge of the wood. Some paratrooper machine gunners had meanwhile withdrawn back to battalion HQ from the confused exchanges in the forest.

On the morning of the 18[SUP]th[/SUP], 2[SUP]nd[/SUP] Platoon shot up some retreating Germans then saw the bridge blown at 1100hrs.

IMG_3520sr.JPG

The Son Bridge had already been blown on the 17[SUP]th[/SUP] and with this strong resistance at Best, followed by the destruction of the bridge on the morning of the 18[SUP]th[/SUP], instead of two bridges Taylor was left with no bridges over the Wilhelmina Canal.

XXX Corps was already delayed a day from Arnhem.

IMG_9181sr.JPG

310rcsr11.JPG
 
Some great shots, Kevin! :salute:: I especially like the shots of 30 Corps. in the town and backed up on Hell's Highway.
 

Users who are viewing this thread

Back
Top