Britains 4.7" Naval Gun (1 Viewer)

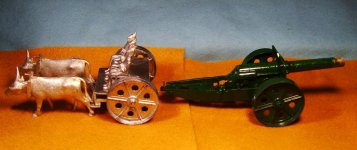
Some spare parts arrived from Dorset - so I was able to make a start on the Limber for the 4.7" Gun.

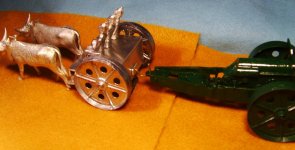
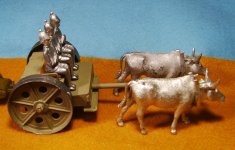
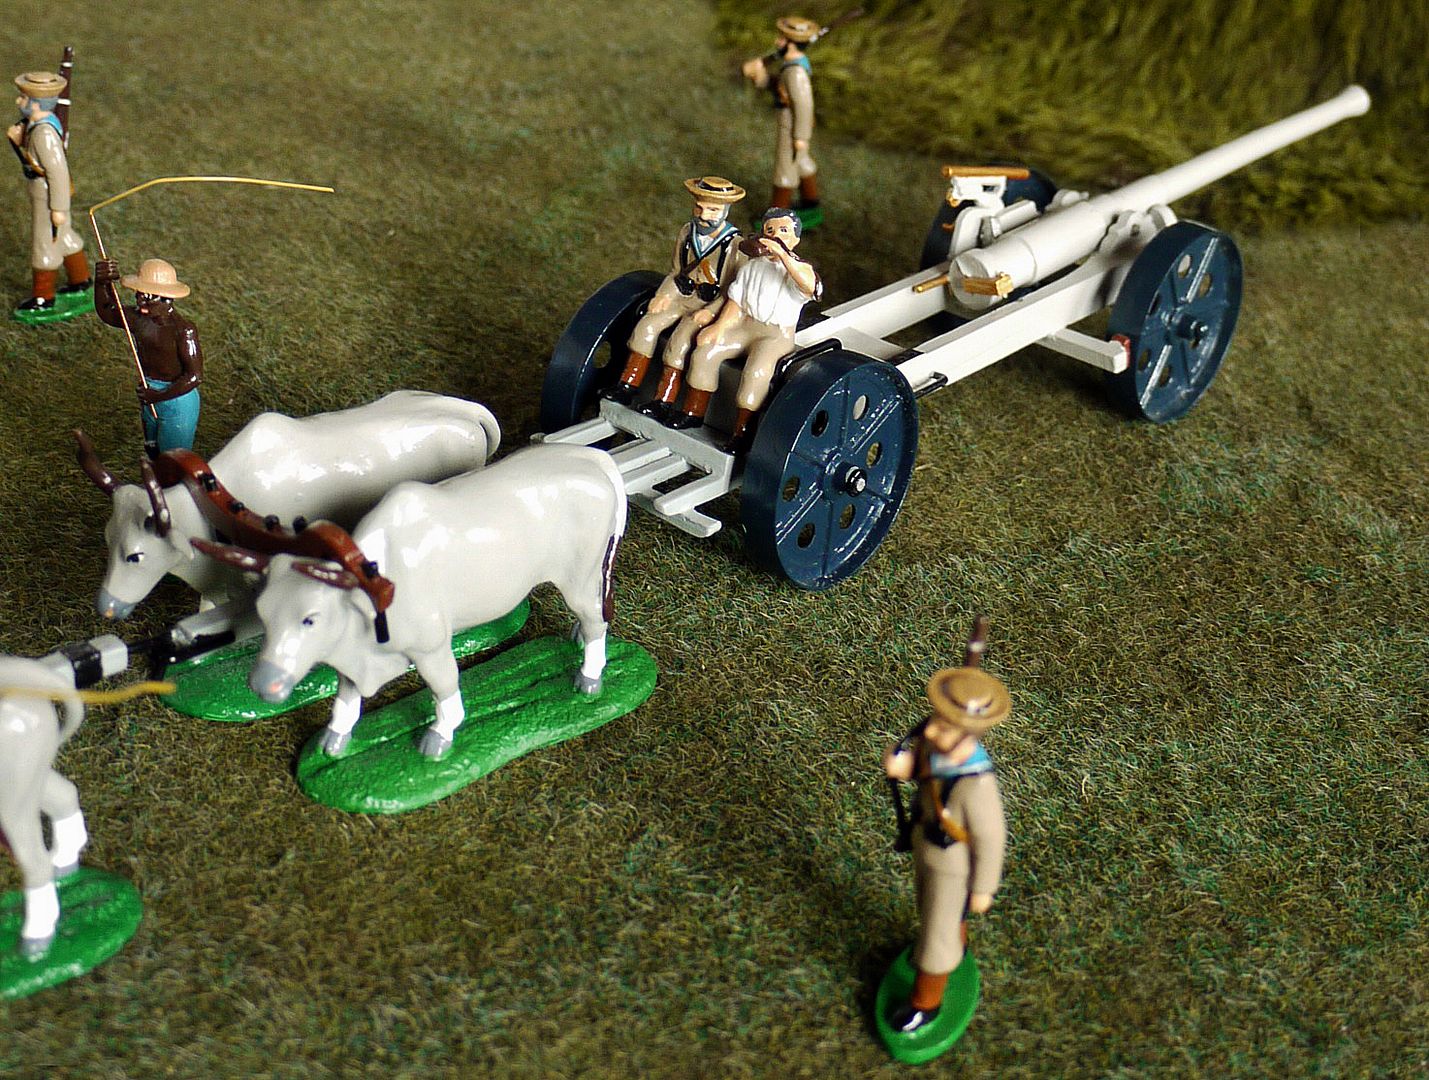
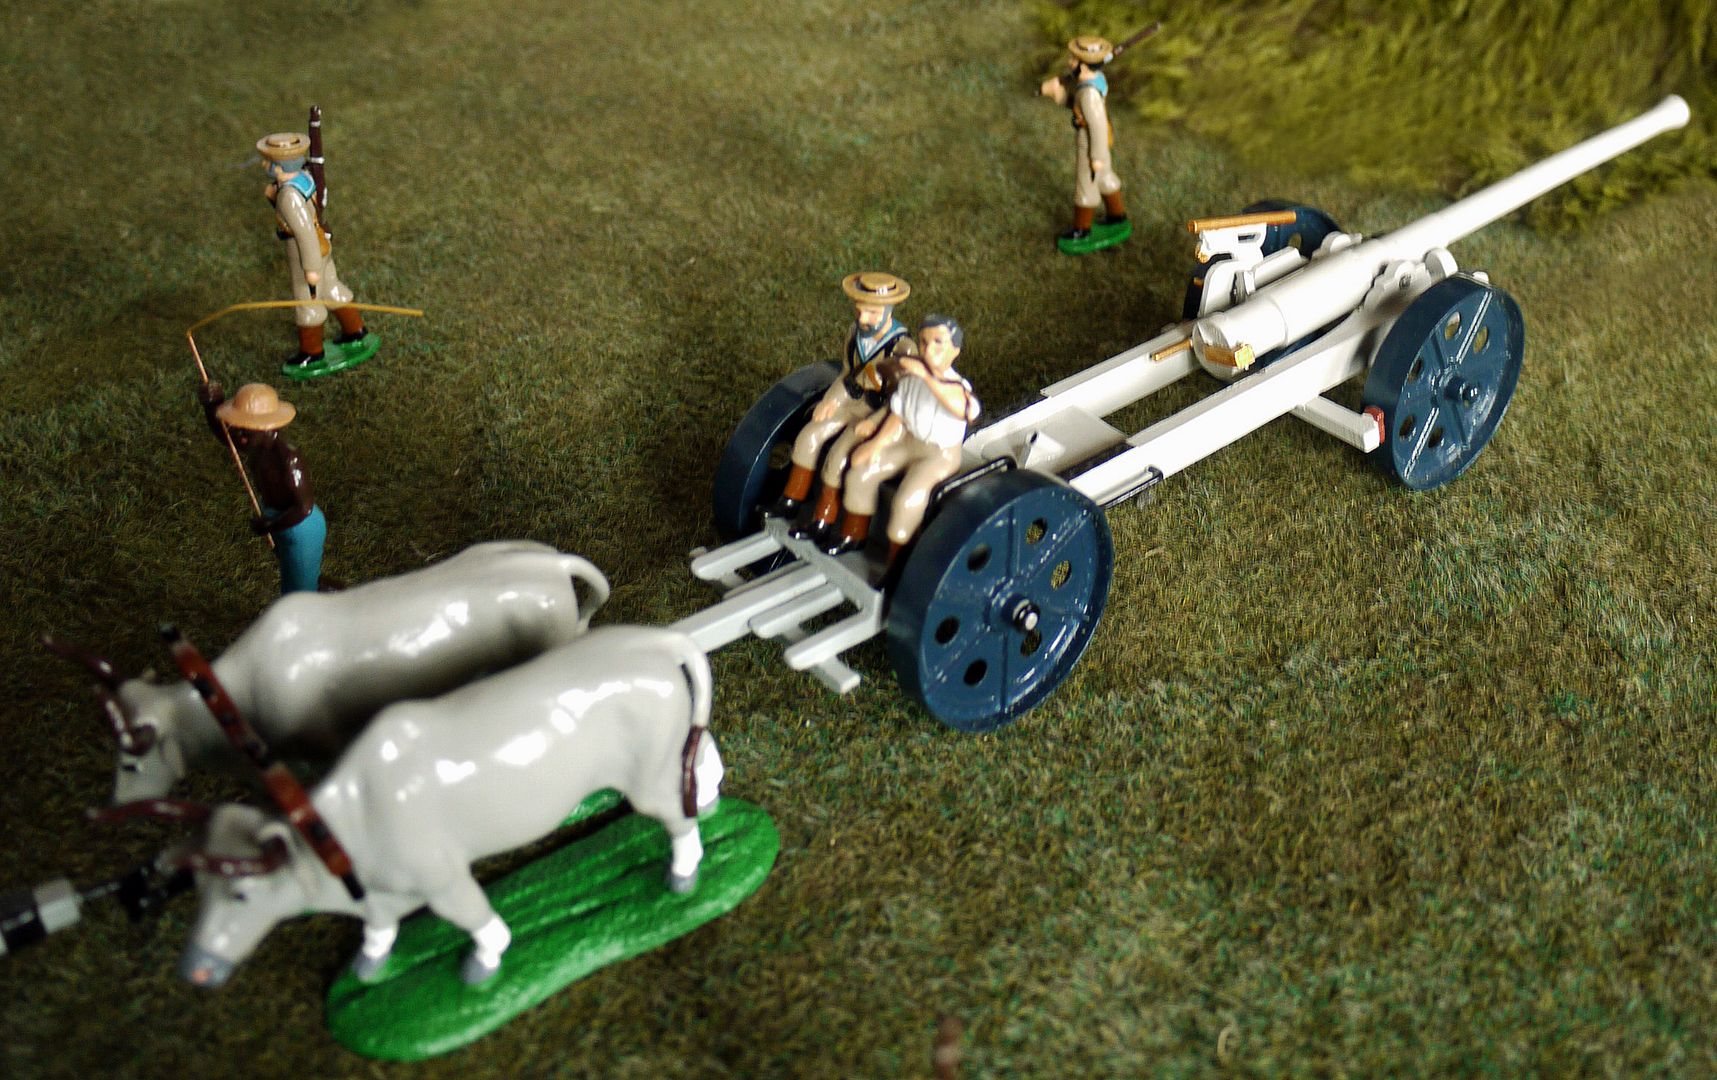
As you can see from the pics below - the wheels were the all important part - and from their dimensions - and the original picture, I was able to design and fabricate something that looks like it. The three stooges seated on it - will be getting a head change to a Foreign Service helmet, by the way - before taking up a more permanent residence. They are there just to show that they will fit on. I also have eight oxen - but just using two at the moment - just to show how they will fit in.

The gun barrel has also been partly restored - using epoxy resin glue (Araldite) and epoxy putty (Milliput). I will have to either find - or probably make up the muzzle end - that has been sawn off by some previous owner! (Why????):confused:

Still not sure of that dark green colour for the set - as I would prefer something like an olive green or even khaki again.

It all works, so far, anyway jb

PIC_4642.JPGPIC_4643.JPG
 
You're a machine, John! Crankin' 'em out like a man possessed! :D

Prost!
Brad
 
You're a machine, John! Crankin' 'em out like a man possessed! :D

Prost!
Brad

Well, Brad - with the weather here - such that it is ( cold and rainy), what better than to sit at my snug little centrally heated work-place - surrounded by all of my little chums - and indulge myself in a little bit of pure pleasure. I actually LIKE knocking 'em out - and when you have to think a bit about what you're doing - even better.

I'll slow down when the weather is nicer.

Gotta keep the grey matter in good order! .:D

jb
 
Same here. I've got my painting kit set up in the kitchen; too cold at the bench in the basement. I put the radio on, brew up multiple cups of strong black tea and work on the backlog.

Prost!
Brad
 
I have mostly completed my limber for my new 4.7" Gun - so I thought I would show you how it is developing. I used the same wheels for the limber as was used for the gun (i.e the distinctive "boiler plate" wheels ). These were obtained as spare parts from Dorset Model Soldiers, who cast them up especially for me - for which I am extremely grateful. (Thanks go to Obee for the tip-off that they might do them for me).

They are not listed as spares - but are part of the complete gun that they will do for collectors.

I'm still working on trying to repair the barrel of my newer gun - so have attached my "Old" original one to the limber - and also seated three figures on it (just to show that they will all fit), and hitched up a couple of oxen to the draw pole - again, to show how the first pair will fit.

I really had to scratch my head for what to use as a draw-pole, but eventually it dawned on me that I had several old paint brushes in my pot which had become worn out - and each of them had a handle!!!

Eureka! I had several to choose from which could become my draw-pole.:D

After a bit of trimming, and epoxy glue - one fitted the bill perfectly - as you can see attached. I will be putting my oxen on small bases - in pairs, (as I did my Water Barrel Cart), before linking them up by chain - to form a team of eight to draw the gun.

Once my newer gun is at a stage worth a pic - I will show how that's progressing too. jb

First pic shows limber towing my (old gun). I've decided on a light khaki colour for my gun and limber this time, which is considerably lighter than my first Khaki gun, as you can see.

PIC_4649.JPG

Next pic is a closer view of the limber - with draw-pole which attaches to the first pair of oxen. The oxen will be paired onto a base - but the limber will be free to run on it's wheels, ( for playtime for me!). The gun will also detach - (and I'm also contemplating a gun team in action for that at some later stage).

The three RA crew on the limber, (FS helmet head change required), will be added to by four others with whips, who will be driving a pair of oxen each - and three more plus a Sergeant will walk alongside the gun. I'm also thinking of an armed Escort group of Infantry to accompany the group eventually - but these can come later - after my initial gun/limber/oxen team (I call them Phase One), have been completed.

PIC_4650.JPG
 
Hahaha JB. Coming from a master restorer and converter, that's funny.

Rgds Vic


Yeah but.......................What would he use a muzzle end from a 4-7" for???? Repair another broken one???? But then......he's got another broken one????? I don't get it? jb
 
Hi JB,

Just a pair of oxen?...:)

Rgds Vic

4 pairs actually - but I'm starting with the first two - who will be connected to the cart. The other 3 pairs will be connected to the First Pair by chain - as in the real thing. I believe the real thing had up to 8 pairs - but my cabinet will only take the length of Gun, Limber and 4 pairs of oxen. ( I estimate the completed length of the piece at around 65cms ). I maybe could have squeezed in 5 pairs - but what the heck - 4 should be enough to move it slowly. My shelves are on the flat!

The longest journey begins with the first step, and you gotta pace yourself to eat an Elephant........... Hey! - did someone say that before???{sm4}

A profound jb.{sm2}
 
Great thread jb, I've been following since the beginning{eek3} :salute::

How about some native drovers if you are going to use your set in a Boer War scenario ^&grin

I'll dig out my Trophy set and get some up to date pictures later this week if you like

All the best

Martyn:)
 
Great thread jb, I've been following since the beginning{eek3} :salute::

How about some native drovers if you are going to use your set in a Boer War scenario ^&grin

I'll dig out my Trophy set and get some up to date pictures later this week if you like

All the best

Martyn:)

Hi - M, well, not exactly in an active Boer War scene for this one, as the Royal Artillery guys will be in their best bib-and-tucker. If they were on active service, I guess they would be in fatigues?

What attracted me to this set in the first place was their FS uniform - when I found the picture. Native drovers are a nice idea though - and a pic from you would be great, thanks.

Just beginning to cut out some bases for the Oxen this-afters - will try to paint first pair later. JB

I think Dorset does that type of drover figures - and I have more stuff to order from them anyway.
 
Great thread jb, I've been following since the beginning{eek3} :salute::

How about some native drovers if you are going to use your set in a Boer War scenario ^&grin

I'll dig out my Trophy set and get some up to date pictures later this week if you like

All the best

Martyn:)

Great idea Martyn, but then again you having great ideas is rather commonplace. :wink2:^&grin

Here's a pic (a rather poor one at that) of a Little Legion Native Drover.

B.
 

Attachments

  • 100_2876.jpg
    100_2876.jpg
    164.4 KB · Views: 200
Here's an update on progress with this project.

First pic gives an idea of what the finished length of the set will be, ( around 65-70 cms, depending on final distance between oxen).

On the left, is the 4.7" Gun. (also shows in pic 2). Note that my barrel end repair is still not hard enough for me to sand down to completion. I had to sleeve the barrel down slightly ( it may be still possible to fire it using slimmer ammo!), and then fit a suitable length of (35mm) tubing to the end of barrel, using epoxy resin glue. ( I used the tube of an old disposable propelling pencil as the tube, which was of the same original diameter of the remaining piece of barrel. Once that was glued to the inner sleeve and barrel end, and after it was set again - I could begin applying Milliput ( two part epoxy putty) over the new piece of inner barrel, to the approximate depth required.

I am now patiently waiting for the putty to "cure", so that I can sand it back to match up with the old barrel. I've painted the rest of the gun to the shade I'm after. (Khaki Drill)


PIC_4655.JPG

The limber and first two oxen has been built together into one piece - the gun of course, detaches for use. My limber was scratch built, using the pic that started all of this madness, as a guide. I sourced the all important wheels from Dorset Model Soldiers, who cast them especially for me at my request. (thanks to both owners Peter and Andy). I also purchased three seated figures and three Foreign Service Helmet/heads - my intention being to make them up into Royal Field Artillery - again as in the Original Pic. The original castings were beheaded, ready for new Foreign Service(FS) heads. Unfortunately, the guys sent me two FS helmet heads - and 1 Wolsely Helmet head - which explains the beheaded casting sitting between the two partly painted gunners! An e-mail has already been sent requesting the correct helmet/head.

It was important to make the limber wide enough to seat three abreast though - which is why I needed them before construction began.

The oxen have all been made up into pairs, and permanently pinned and glued onto small stands (7cms X 5.5cms). This is to facilitate their connection/ disconnection from the other parts of the set. Anyone who has ever wrestled with putting separate piece and connecting them all together with fiddly connections - into a cabinet - will instantly know why I chose to do it this way.{eek3} (The oxen will all eventually be connected by chain to the limber, and the gun connects by its trail eye, onto a hook on the limber (as shown in pic).

The rest of the paired oxen are in various states of progress - as shown in pic 3.
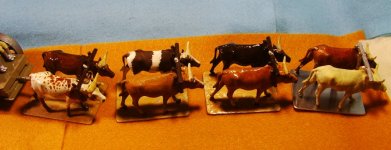
PIC_4657.JPG


Rather than just paint the oxen in a solid colour, as most sets that I have seen do - I have tried to make each oxen a little more like the real thing, by using images of oxen found on google Images as guides for painting. I have also tried to make each ox just a little different from each other - and using contrasting beasts on each stand. You may see the progress starting from the limber pair - and contrasting them with the state of finish on each pair as they go towards the lead pair - which have to be painted - before they go on the stand - and have the top of the yoke permanently fixed in place. Needless to say, the hooves are pinned - and holes drilled in place to accept them in the stands (bases), before painting takes place - by dry fitting each pair first.

I'm going to fit a "ring" to the underside of each yoke - for a chain to connect all four pairs together - and then to the limber, once all parts are completed.
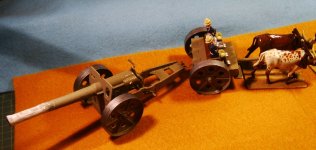


PIC_4656.JPG


I will also make up another seven RA gun-crew members - who will be marching alongside the gun, (presumably they all took turns to ride for a time on the limber?). One will be a Sergeant, thus making up the gun crew that Obee suggested might be the crew for this weapon. I already have a mounted Officer ( as in the original set ) who does some admin task, who will also be along.

In addition, I have a small platoon of 8 Infantry - under the command of a Sergeant Major , who will accompany the group to their destination, to give fire support - if the Group is ambushed along the way.

However, I don't intend to begin these - until the Gun, Limber, and Oxen are completed. So these extras can be looked on as sub-projects for some time in the future.

That's it for now - (to be continued) jb:salute::
 
Excellent progress, John! I can hardly wait to see that howitzer, once the putty cures and you get it painted.

...Rather than just paint the oxen in a solid colour, as most sets that I have seen do - I have tried to make each oxen a little more like the real thing...I have also tried to make each ox just a little different from each other - and using contrasting beasts on each stand...

You have a good eye, and are very wise, to think of this. You and I know, as painters, working with castings like this, how effective it can be to vary things a little bit, from one casting to the next in a series of all the same castings. Especially if you're going to put them into the same display, it makes things look more natural or life-like, even when we're painting in a traditional gloss style.

Everything is coming together nicely!

Prost!
Brad
 
Excellent progress, John! I can hardly wait to see that howitzer, once the putty cures and you get it painted.


You have a good eye, and are very wise, to think of this. You and I know, as painters, working with castings like this, how effective it can be to vary things a little bit, from one casting to the next in a series of all the same castings. Especially if you're going to put them into the same display, it makes things look more natural or life-like, even when we're painting in a traditional gloss style.

Everything is coming together nicely!

Prost!
Brad

Thanks Brad - I'm pleased that you like what I'm doing so far. Like you - I'm keen to see the end result - but I'm not rushing with this one. Still waiting for a few bits and pieces to come in though, so if I have to wait - there are lottsa things on stand-by!!!

By the way - if you (or any other Forum members) interested in a potted history of Britains 4.7" Naval Gun, take a look at this link by an expert on the "Other Forum". He's known as Gunner or Jim - and Boy, does he know his stuff about this and a few other Britains Guns.

Here's the link - most informative - and MOST useful to a novice like me when repairing these things:

http://www.planetdiecast.com/index.php?option=com_kunena&func=view&catid=138&id=50386&Itemid=0

Cheers for now - got to go - have an ox to paint! :D:salute:: jb
 
Great work Johnny! I wish I was half as talented as you when it comes to restoring old figures and sets! Very cool to see and am waiting the next edition to the thread. Thanks for sharing

Dave
 
Great work Johnny! I wish I was half as talented as you when it comes to restoring old figures and sets! Very cool to see and am waiting the next edition to the thread. Thanks for sharing

Dave

Glad you like it so far, Dave. It's just practice - the more you do something - the better you get at it.

I don't think I'm that far off - with this phase of what I want to produce - but may be waiting for some more spares to arrive for the rest.

Adios for now amigo.
 
Hi Victor,
I saw this dio and immediately remembered of you......good idea for your large British Mortar...


Hello Luiz,

Your artillery collection is overwhelming, like a heavy barrage...:)

I have further painted my guns in a darker green and weathered them slightly. These will be placed in my redux displays until I come up with the idea of using them in separate vignettes.

I also have a German 250mm howitzer (Mountford) but the scale is too small for 1/32. FYI, the Trench mortar is classified as 1/35 in the supplied instruction manual. Hence I will probably knock up my own figures, adjusting their size depending on which gun will be deployed, using Scalelink/Airfix mixed media conversions.

For the trench mortar, there are 4 handles at the base. Are these meant for the gunners to manually push/pull to rotate the direction of the barrel?

Rgds Victor

View attachment 225561
 

Attachments

  • British Mortar.jpg
    British Mortar.jpg
    179.6 KB · Views: 202
Hi John

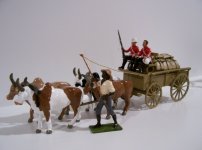
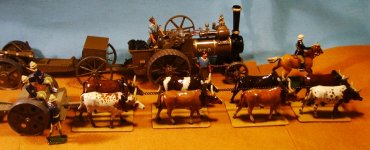
As promised here are some pictures of the Trophy NAVAL COLUMN. Had some great fun setting it up yesterday but I do need a longer table^&grin


I'm looking forward to seeing your complete set:salute::

All the best

Martyn:)
 
Hi John

As promised here are some pictures of the Trophy NAVAL COLUMN. Had some great fun setting it up yesterday but I do need a longer table^&grin


I'm looking forward to seeing your complete set:salute::

All the best

Martyn:)

Wow! M - that's a real beauty - and sixteen Oxen!!! That's just a simply stunning set. Well done - and yes, I know what you mean about room to display them! I went for eight oxen, as my shelf space within my three cabinets is 75cms MAX., (so thankfully, my set will fit :D) I have already asked Dorset, if they can find a figure of a "Native Drover" which I could use. We shall see how that works out (or not).

Love the way that your oxen pairs are connected too - how imaginative. I've gone for a simple chain, as most of the pics that I've found on Internet searches go for this method in real life. At the moment, I have just used a single length of chain - connected from the limber to the lead pair - through a simple loop ( iron ring), connected to the underside of each yoke. (Yet to painted black). What I'm considering doing - is to have a short length of chain for each pair, fixed to the iron ring and terminating in a hook. Then each individual pair of oxen can be "hooked" on to the one behind, which would make for easier moving of the piece around.

[ As an aside - each "iron loop" is a picture hanging screw in thingy - from which picture wire is threaded through on the backs of pictures!] If you have a look at Oxen Yoke images - you can see many pics of these rings, online. I simply drilled down through the centre of each yoke - and screwed them in upwards.

I did consider using The Naval Brigade as my Gun Team, as is yours - but as soon as I saw the pic that started it all - I just fell for those RA uniforms - and that was that! To be fair - I would have had to swap the Gun-trails for wooden beams for it to be authentic - so I just went for the easier option for me. Maybe if I find another one to repair - I might go there - but two is okay for now, don't you think?:confused:

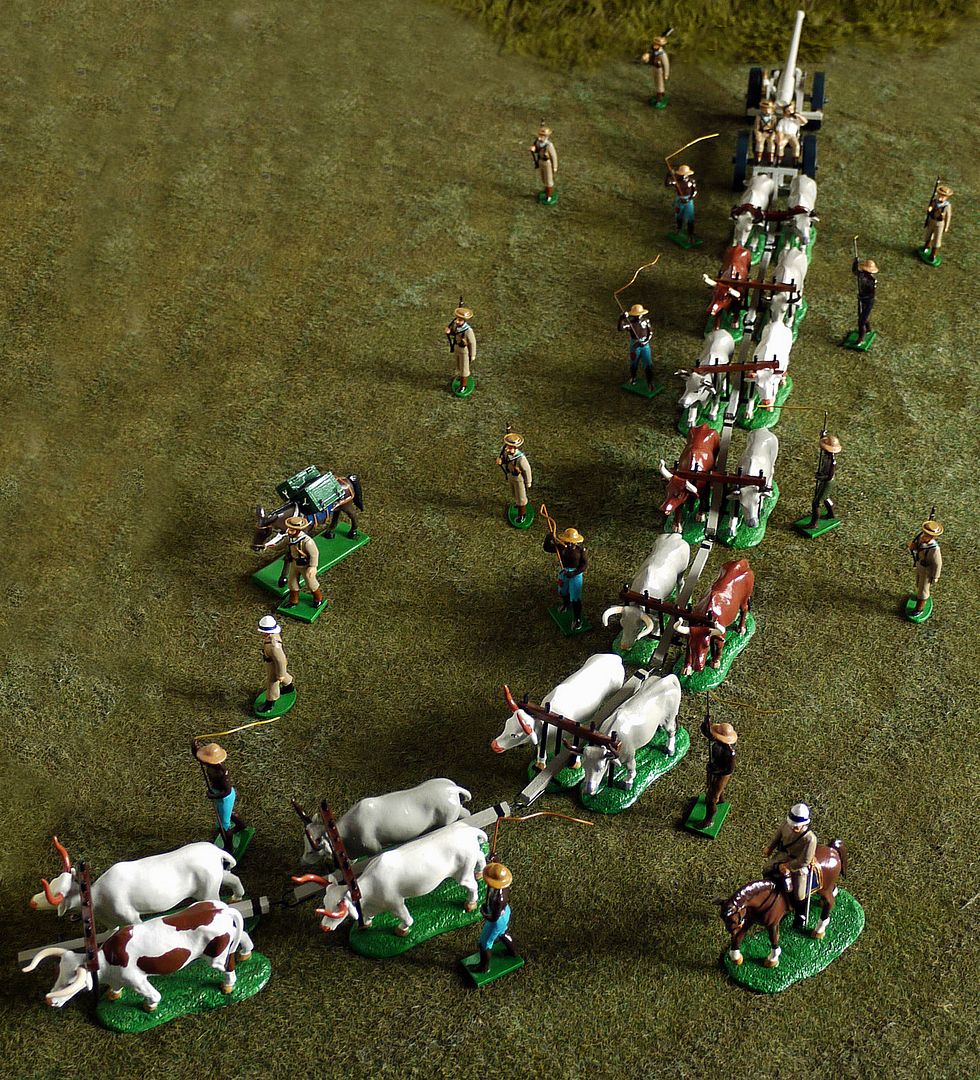
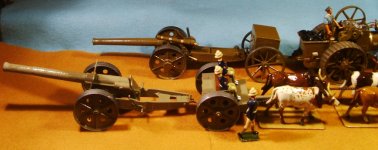
Here's a latest pics showing the tow chain at the moment - just to give an idea of how the whole thing looks - and to give me an idea of dimensions. (at the moment - the overall length of all elements is 64cms - so it WILL fit my cabinet with 5cms to spare at each end, - perfect!). Note also my Mounted RA Officer and RA Marching Gunner - both of which are also Britains repaired figures, and will feature in my eventually completed set. I'm still waiting for some of my bits and pieces to arrive - but have begun painting some Khaki clad Infantry - who will accompany the RA Gun Team.

I also like the addition of a mule with a couple of ammo boxes attached in your set M - which has given me an idea too! I recently found a Britains Mule from the Mountain Gun team - with all legs broken off. I think I will repair him and add him in - as in your set. Well, the Infantry lads will need some ammo, if they get attacked!

I've also included my "other" Britains 4.7" in the pics, (which is an earlier Model dating from 1915 - than my newer 4.7" with gunshield, which was produced far later). But what I really like in my new set - just as in yours - are those big "boiler-plate" wheels on the limber. I really think that feature sets the whole thing off wonderfully. And in case anybody has missed it - these wheels MAY be purchased individually as castings from Dorset Model Soldiers. (thanks again lads!).

Thanks M - for a look at yet another lovely and wonderful set. I'll show you how I get on later ............. jb


PIC_4663.JPG

PIC_4662.JPG
 
Last edited:

Users who are viewing this thread

Back
Top