Building and detailing the M4A3 Sherman tank in 1/30th scale (1 Viewer)

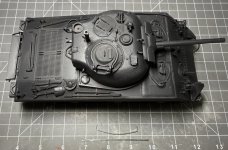
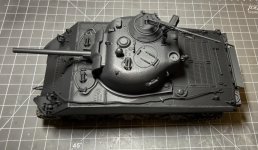
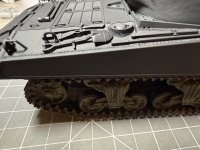
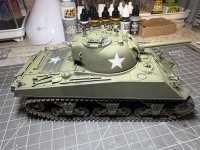
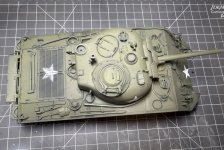
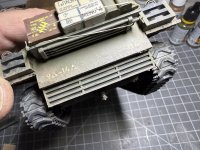
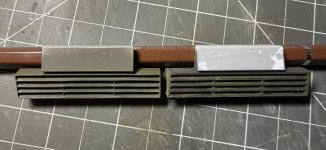
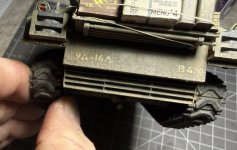
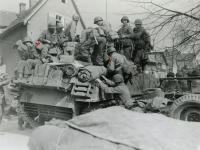
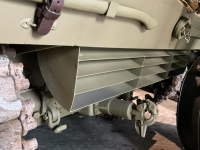
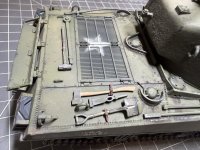
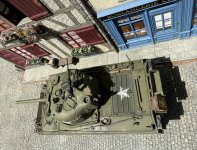
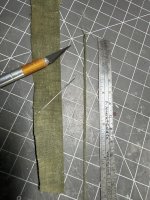
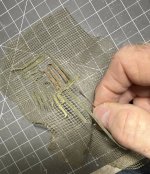
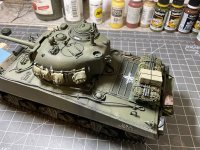
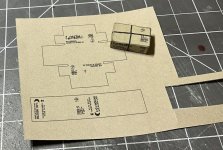
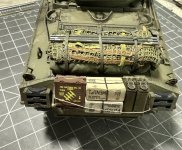
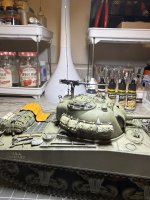
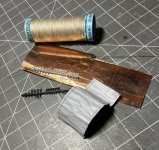
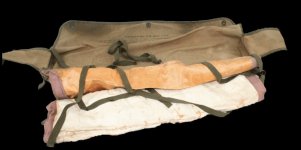
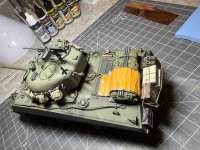
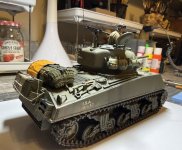
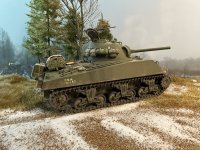
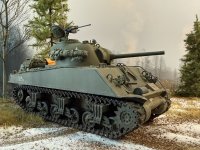
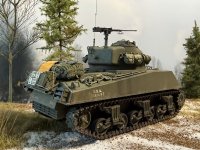
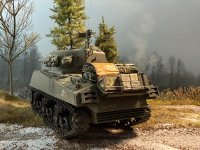
When I finished adding most of the details to the upper hull and turret I needed to start priming, painting and weathering the upper hull of the M4A3. One of the features I noticed in many of the wartime photographs were the addition of steel rod or flat stock added to the turrets for stowing various packs, blanket rolls and other soft stowage. In addition other items such as helmets or even rubber overshoes are hung up high to be more accessible and to an extant above the mud. I decided that in order to insure that it would be durable during handling that I would hammer out a piece of iron wire to approximate the shape and size I needed. Once the turret is painted I can add the support by gluing the ends into holes drilled into the turret and add stowage. I also decided to replace the headlight, tail light and siren guards with some prints that were a bit more refined and detailed up the tool tie downs. I am sure that before it is all said and done I will add other similar improvements as I add stowage. An easy to add detail at this point was to drill the mounting holes along the lower edge of the hull where the fenders would have been mounted. I also remembered to add the small exit pipe for the auxiliary generator that vented out of the crew compartment at the left rear fender. It was made from small brass tubing that had the walls thinned down from the. Inside and then was crimped to an oval with small pliers to simulate that detail on a real vehicle. I think I will also try to improve the exhaust deflector, but more on that later. The last thing I did before priming the tank was to drill the drain holes through the vertical splash guards that protects the turret and various filler caps, a small but interesting detail.
 

Attachments

  • IMG_6754.jpeg
    IMG_6754.jpeg
    147.1 KB · Views: 3
  • IMG_6757.jpeg
    IMG_6757.jpeg
    130.1 KB · Views: 3
  • IMG_6758.jpeg
    IMG_6758.jpeg
    142.4 KB · Views: 3
  • IMG_6755.jpeg
    IMG_6755.jpeg
    80.5 KB · Views: 3
Very interesting to see the work that goes into these products and others.
Thanks Ken. We met once but you've met everybody so no foul if you don't remember. We liked your round-based dios at the time.
Paddy for Dad&me
 
I started to apply various shades of Olive Drab paint over the black primer with my airbrush on the main hull and turret. The transformation was startling when compared to the flat black primer coat and it is now starting to look the part of a small version of this classic piece of World War Two American armor. I used three different shade variations of OD from a Vallejo US armor paint set that I am pretty happy with and the weathering will shift the color a bit more before it is all said and done. Before I went too much further I decided to use the decal sheet to create painting stencils for the white identification stars. Using masks and spray painting the stars white over the base color really looks good. Looking at vehicles from the late 1944 to 1945 period, the stars often only appear on the front of the transmission housing, the rear deck and on occasion the turret sides. On many of the 76mm armed M4A3s there were small stars on top of the larger turret. The upper surface international recognition markings combined with the brightly colored AL-140 and AL-141 Air Identification panels were important to help the roaming Allied fighter bombers to recognized friendly forces during the fast advances toward Germany. When vehicles had the added turret racks added I suspect that the various musette bags, bedrolls and other items attached minimized the visibility of the stars, but with that said the turret stars are often absent. I think the next vehicle I finish will not have markings on the turret.

I also started to add weathering such as chipping, scratches, oil and gas spills along with the first applications of light mud effects. I used a combination of water based acrylic paint, artist matte medium and modeling paste along with some very fine sifted soil for the mud and I will give a little more detail on additional techniques next.
 

Attachments

  • IMG_6779.jpeg
    IMG_6779.jpeg
    174 KB · Views: 3
  • IMG_6780.jpeg
    IMG_6780.jpeg
    157 KB · Views: 3
  • IMG_6777.jpeg
    IMG_6777.jpeg
    151.2 KB · Views: 4
  • IMG_6778.jpeg
    IMG_6778.jpeg
    135.6 KB · Views: 3

Users who are viewing this thread

Back
Top