7th OVI
Sergeant
- Joined
- Jan 1, 2009
- Messages
- 678
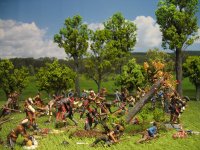
Step Four - once sanded, the surface is dry brushed to highlight features of the bark and provide color to match the tree you are trying to simulate. After the paint has dried, additional small branches are added to the tree in a layer approach starting at the top of the tree and then working down until you have the desired look. The branches are added by creating a hole in the surface with either a push pin or small nail, glue added to the branch then inserted. Small branches can use white or wood glue, larger branches require super glue to allow quick drying.
![IMG_2652[1].jpg IMG_2652[1].jpg](https://forum.treefrogtreasures.com/data/attachments/158/158231-e76789428a3cbe76adf53f8f42fe4167.jpg)
![IMG_2654[1].jpg IMG_2654[1].jpg](https://forum.treefrogtreasures.com/data/attachments/158/158232-aeb9703ad2a05a6f3998169b8d134638.jpg)
After all of the branches are added, I remove the working nail from the base of the trunk and replace with a permanent base made of 1 or 2 thin washers and final pin/nail to provide stability and a means to attach the tree to diorama bases using magnets. The bases are finished off to match the ground floor of the final large forest diorama base
![IMG_2660[1].jpg IMG_2660[1].jpg](https://forum.treefrogtreasures.com/data/attachments/158/158233-71cea80d4128b6b970b7fe2a4d2f589c.jpg)
![IMG_2661[1].jpg IMG_2661[1].jpg](https://forum.treefrogtreasures.com/data/attachments/158/158234-ea2fb6efd53b8cbc9eda8711e45f7819.jpg)


![IMG_2663[1].jpg IMG_2663[1].jpg](https://forum.treefrogtreasures.com/data/attachments/158/158235-797c4d6a75a46672e7b812c22440d1d3.jpg)
![IMG_2665[1].jpg IMG_2665[1].jpg](https://forum.treefrogtreasures.com/data/attachments/158/158237-53e5bc8f9dc189752470be4039c2f91c.jpg)
![IMG_2663[1].jpg IMG_2663[1].jpg](https://forum.treefrogtreasures.com/data/attachments/158/158236-797c4d6a75a46672e7b812c22440d1d3.jpg)
![IMG_2687[1].jpg IMG_2687[1].jpg](https://forum.treefrogtreasures.com/data/attachments/163/163974-62cf56f26d57c6dc34dccef0060f9067.jpg)

