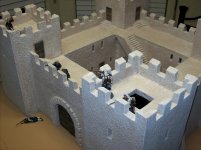
These look outstanding!!
a few questions please....
How do you alloy the Stucco Patch material, with a brush or some other tool?
How do you paint the weathered wood, (what colors) it looks very realistic.
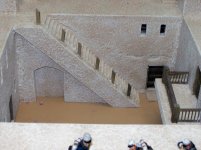
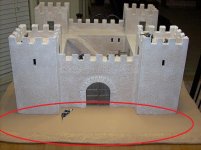
For the Roman fort, what did you use for the base material for the hill?
I am working on a 40MM Alamo, so I will have some weathered wood to paint and
palidsade wall among other things. Thanks.
Walt
Walt...
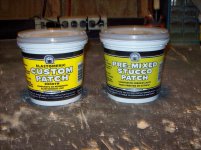
this is what I use on the Stucco patch...available at Home Depot...
one is smooth (elastic)...the other is textured...
I use about a 3 to 1 mix...
3 parts smooth elastic and 1 part textured...it gives a very hard shell durable and almost unchipable exterior finish...
Carlo Terrinoni (Risorgimento on Treefrog) from Italy......who in my opinion makes the best foam buildings on this forum...uses a compound close to our spackle...(it's not stucco patch)...he's from Italy and I can't find a spackle that I like here in the States...the ones I tried don't seem to have the hard shell finish that I like...they seem softer when completely cured and I worry about the strength of the finish...he has had amazing success with them and maybe I just have not found the right product...the spackle he uses gives a smooth finish...no gritty texturing at all...just smooth...it looks great...
the smooth "elastomeric" stucco patch that I use...is called so because it dries with a property that leaves it a little "stretchy" or elastic...to compensate for shrinking and expanding...
however...on a flat surface...you won't notice this...as it dries pretty darn hard...so it's the best product I have found if you want smooth no textured finish...it can be painted on with a paintbrush easily and dries overnight...
the textured stucco patch is very gritty and dries extremely hard...it will take a lot of abuse and is very hard to damage...I have accidently dropped buildings coated with textured stucco patch and there was no damage at all to them...it's a great product...
so I decided to mix the...3 to 1...it seems to give me the best of both worlds...a hard shell with just a small amount of texturing...
Carlo is a good friend of mine...we have discussed our different methods of coating a building...one thing we both do after they are dried...is that we sand off the imperfections to get the desired finish we want...
whatever coating you decide to paint on the exterior...you can sand it down (by hand) to the texture you want...
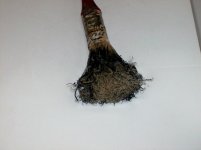
I apply my coating with a nice paint brush...just like frosting a cake...then I poke at it with a really beat up 2" brush (see pic)...lifting up peaks and indentions...
when it's dried...I sand it down to the finish I want...if I sanded deeper...it would be smoother...but I like some "character" on mine...


")