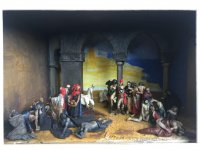
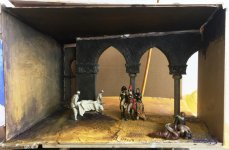
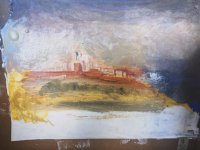
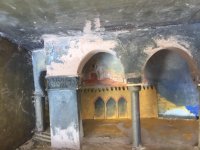
Gros Napoleon at Jaffa (3 Viewers)

Hello John and Sandor,

Good to hear from a couple of Napoleonophiles and thanks for the nice compliment. This DIY section of the forum is relatively lonely. Need more treefroggers to post their projects here....:)

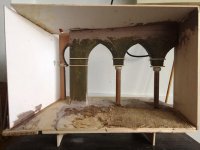
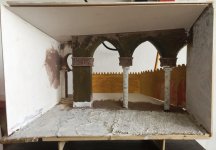
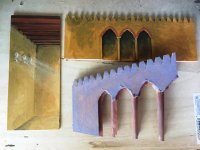
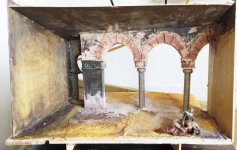
I've added the columns to prevent the arches from falling down...:) Also puttied in the gaps. It's quite fun to stage my figures inside this structure. I'll have to make adjustments here and there to the structure as the footprint is very tight.

I plan to paint in the background and maybe add walls to create a relief effect. Anything I can think of to create visual depth.

Rgds Victor
aa6.jpg
 
Victor — I should add that I have been to the scene of this painting in Jaffa. It’s in a monastery right on the sea wall.
 
Hi Sandor,

You lucky person. I'll bet it was a great trip. Hopefully I'll get a chance to visit the middle east one of these days.

I read about the St Nicholas monastery in the Armenian Church when I initially researched this painting to get more background. It was obvious then that Gros altered the size, columns etc of the space and recreated the setting to give us this romanticised painting.

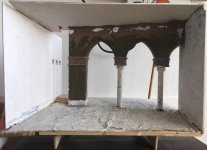
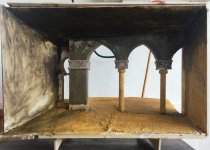
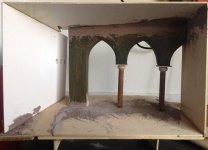
I rearranged the structure a little bit more - I knocked the columns into alignment with a tap hammer. Easy enough as they were wedged in quite tightly. I ripped out the left wall and re-positioned it slightly. I added a piece of sacking to the floor to serve as matting. The back facade was further detailed.

Rgds Victor

aaa3.jpg
 
Starting to build faster here. My orgn is practising a work from home policy so this gives me a little spare time.

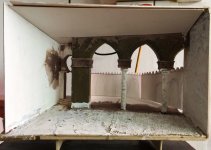
I painted the interior with gesso.

After a lot of dithering, I added the steps and the side arch was fixed. I also raised the back slope to achieve some kind of forced perspective. The ceiling was lowered even more drastically. I cut out another piece of cardboard and glued this in at a more dramatic angle.

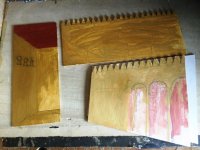
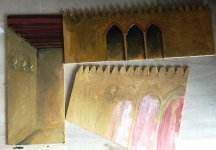
The courtyard walls were cut out from cardboard .

I painted these masking parts, paying special attention to the side arch panel.

s44 small.jpgs45 small.jpgs46 small.jpgs47 small.jpgs48 small.jpg
 
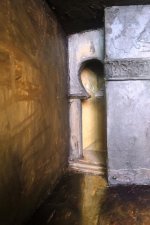
I gave the interior a wash with thinned paints. I painted a shadow of the arch on the right on a whimsy.

a.jpg
 
I gave the interior a wash with thinned paints. I painted a shadow of the arch on the right on a whimsy.

Looking great Victor, and great to see your article on Shadow Box Dioramas in the latest Toy Soldier Collector.

I think that this one will be worth of another article later this year :)

JOhn
 
Hi John,

Thanks for your nice comment. I saw that article mentioned on the TSC website but I still haven't yet received my copy. The proofs they sent me earlier looked very nice and TSC has done a great job on arranging that article for their magazine.

I had submitted that article much earlier and it took some time before it was published. I have since submitted two more diorama articles for their consideration since then so who knows? This Gros diorama actually grew out from those diorama articles and I've been learning and honing my skills with each project.

As you will see, this Gros project is not easy. Even with planning, I still encounter problems. I guess this arises because I am salvaging earlier over-ambitious projects and have to work around those outdated ideas.

Rgds Victor
 
Here, I've placed the background cutout walls in place. Notice that I've tried to create a 3D effect with the right wall.

Also, I've tried to stage some of the figures and a problem has occurred. The left hand side grouping is a little crowded. The Arabs cannot fit in behind the foreground group and the litter bearers. @#$%^!

s50 small.jpg
 
Here's the background cutouts. I've added rays of light to the light openings, cut out the arches and used different size rods to represent the pillars in 3D.

s51 small.jpg
 
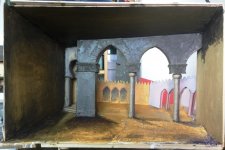
Here's the hallway cutout in place behind the side arch, and the whole scene with repainted walls and ceilings.

s52 small.jpgs53 small.jpg
 
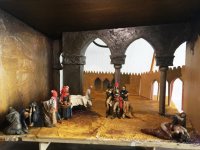
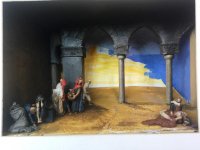
The main figures are staged again. I've managed to wedde the Arabs between the other figure groups by twisting the figures slightly.

Besides that, I think that the arches are a little too tall. Double %&*T*!

s55 small.jpg
 
Here's the semi-full dress rehearsal with most of the figures. I've created some space to fit the two Arabs in-between the other groups.

s56 small.jpg
 
I ripped up the stage and quickly redid the dimensions. Took me less than an hour!

I dropped the arches by about 1/2 inch and this is the result with a few figures before I finalise the ceiling and wall fixtures.

s57 small.jpg
 
Hi Napoleon1er and John,

Thanks for nice comments, wholly undeserved at this stage.

So I'm coasting along here, basking in the glorious romantic light of this diorama and I notice that the top of the pillars on the arches are really too wide. %#@#$%!

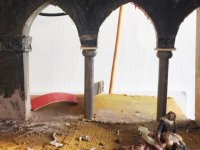
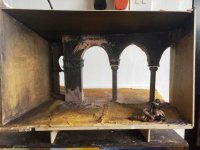
Anyway, with some confidence from the earlier rescue efforts, I ripped out the arches and am now trying to reduce the size of those structures.

Rgds Victor

a16.jpg
 
I'm now at this stage of reshaping the arches. The dried brown putty is wall putty.

a.jpg
 
Here's the semi-full dress rehearsal with most of the figures. I've created some space to fit the two Arabs in-between the other groups.

This is just so amazing of a 'project'...have been wondering on it's status, and can see that much work has been going on 'behind-the-scenes'.

Thank you.
 
Hi Matt,

Thanks for that lovely compliment. I'm reshaping the arches and the shapes looks satisfactory to me. Wall putty is a life saver. You can use it to reshape imperfect structures...

I finally started to paint the background, making adjustment to the placement of the scene.

Rgds Victor

a15.jpga16.jpg
 

Users who are viewing this thread

Back
Top