Hirst Arts Castle and diorama done in 60mm. (4 Viewers)

mikemiller1955

Lieutenant General
Joined
Aug 3, 2008
Messages
17,506
Be forewarned!

This is going to be a long post.

Please be patient on future posts if you get interested.

I have tons of photos and explanations that will take some time to put into script.

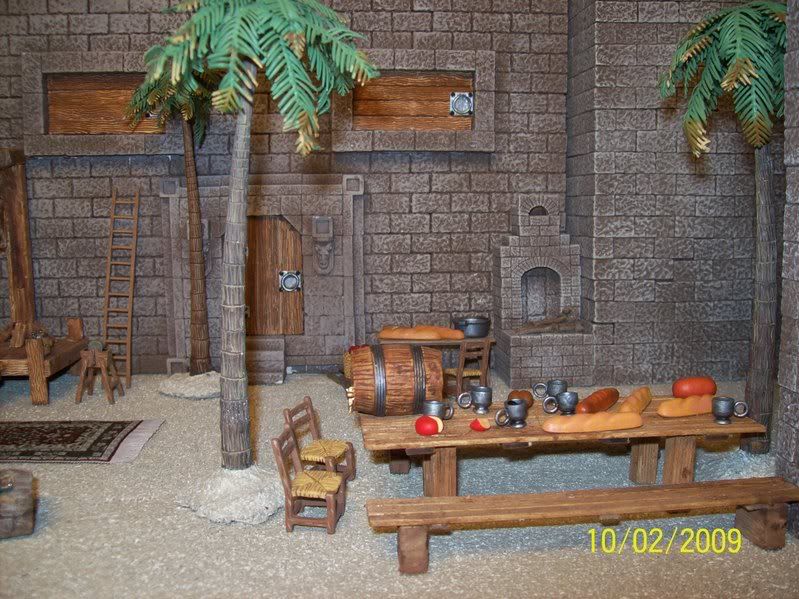
While my castle is finished, my diorama is still incomplete, but should be finished in the next few days or week at the most. If you just want to view the finished diorama, come back in a week or so, I should have full photos by then. I will post progress until I’m finished.

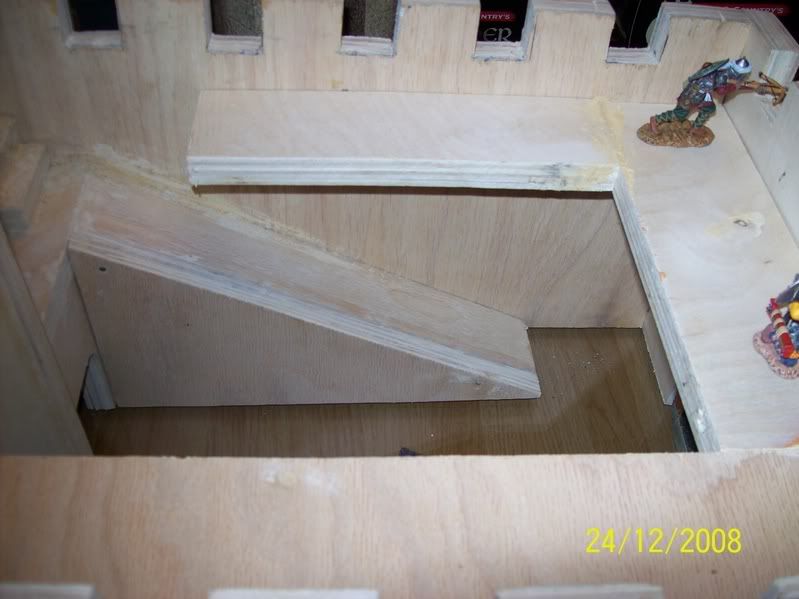
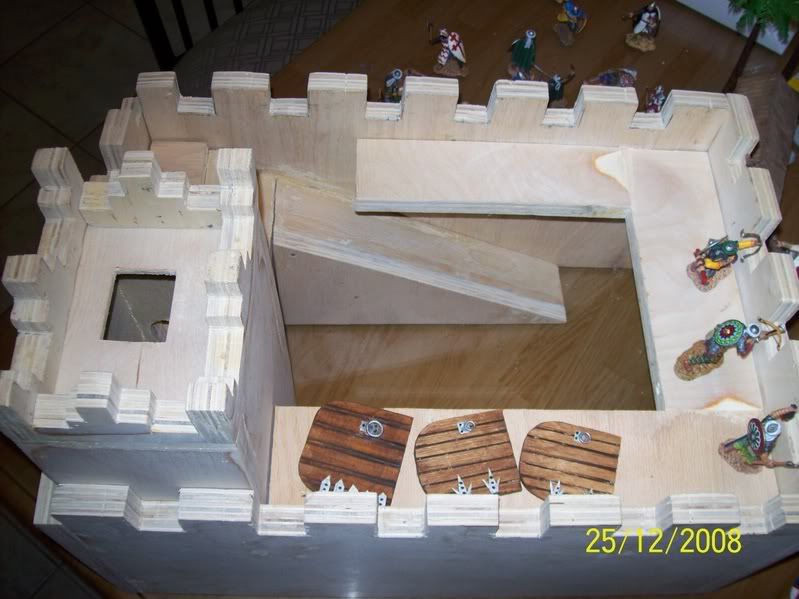
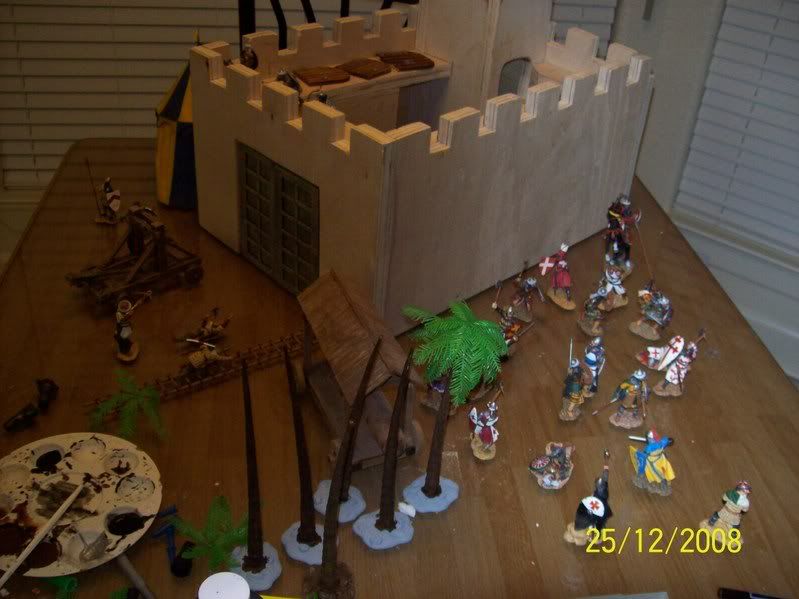
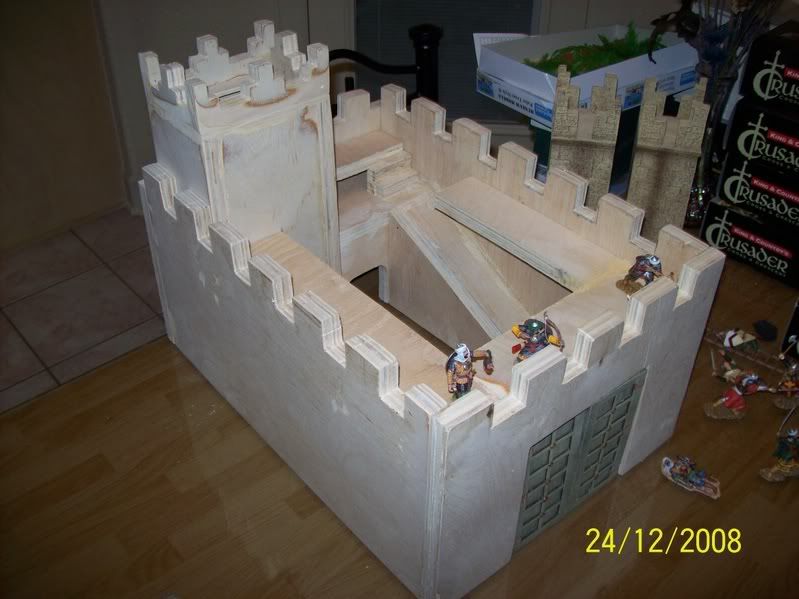
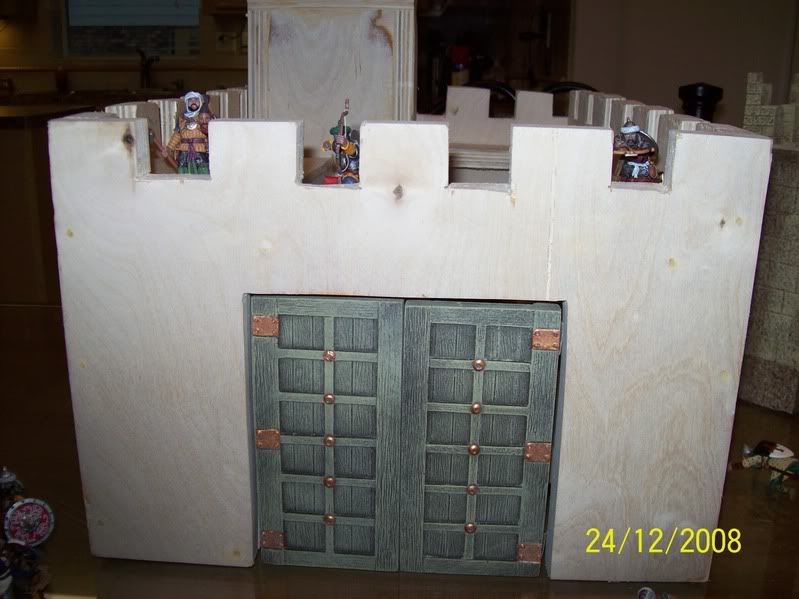
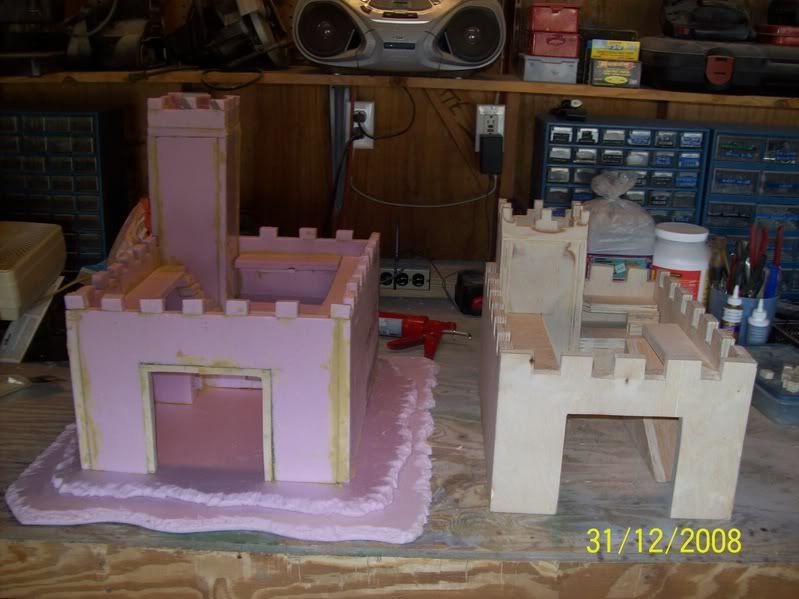
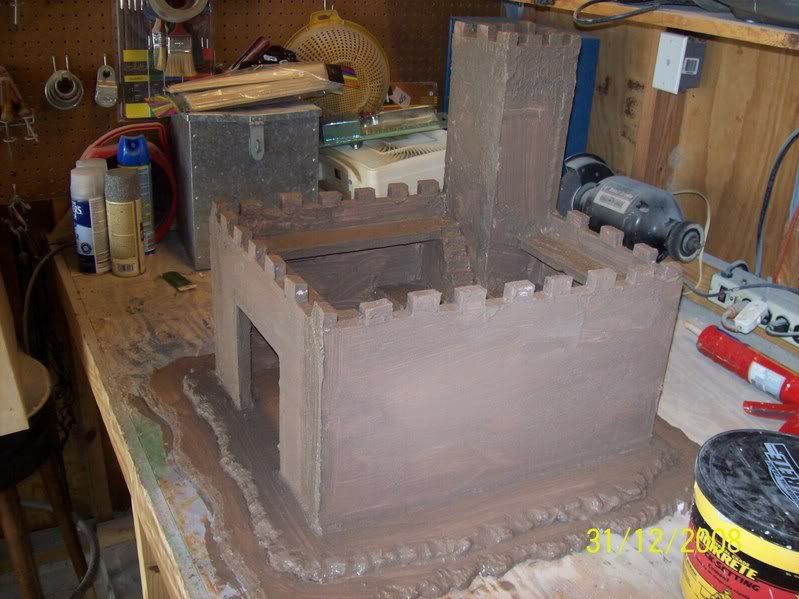
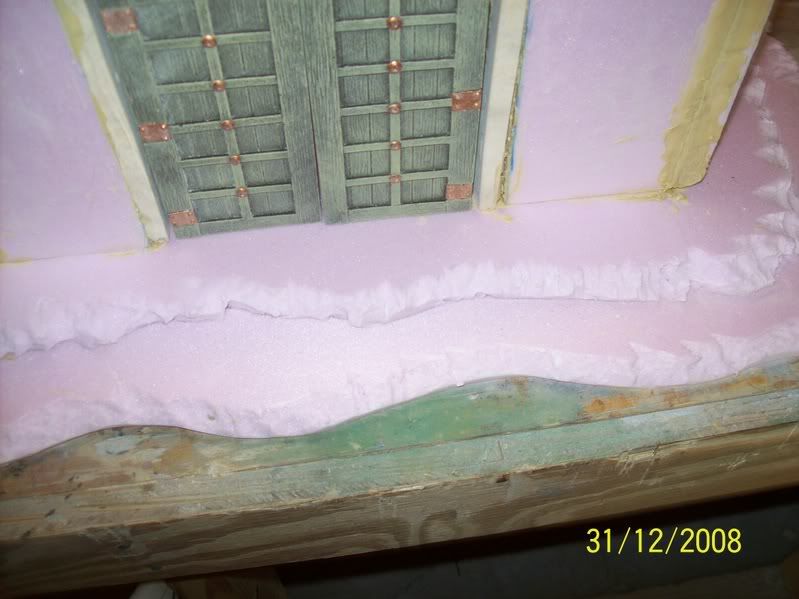
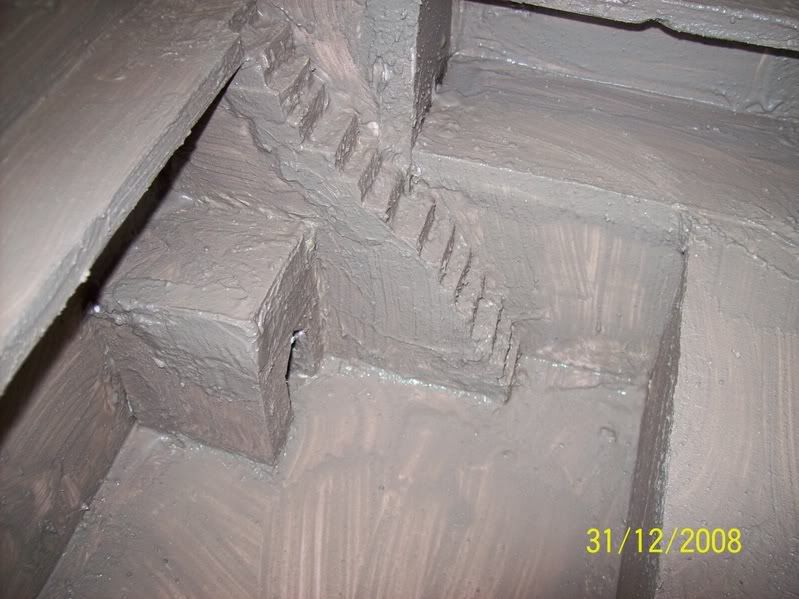
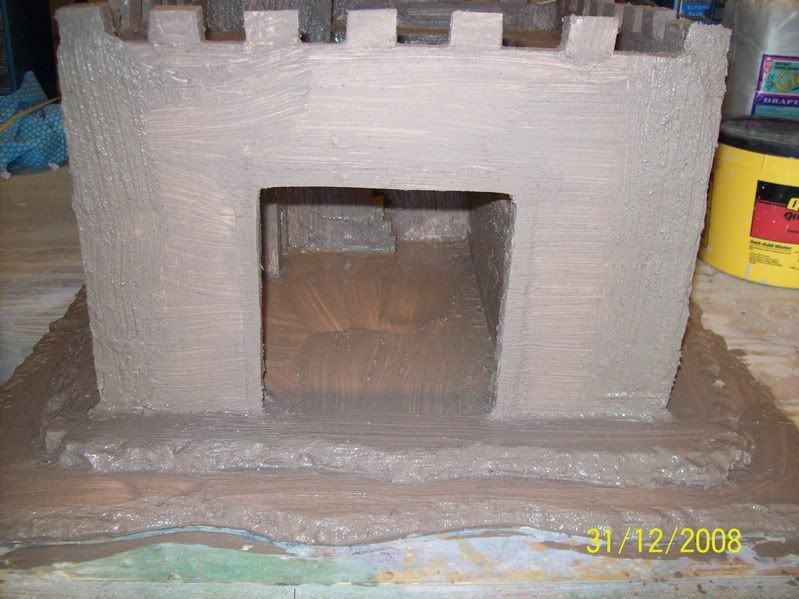
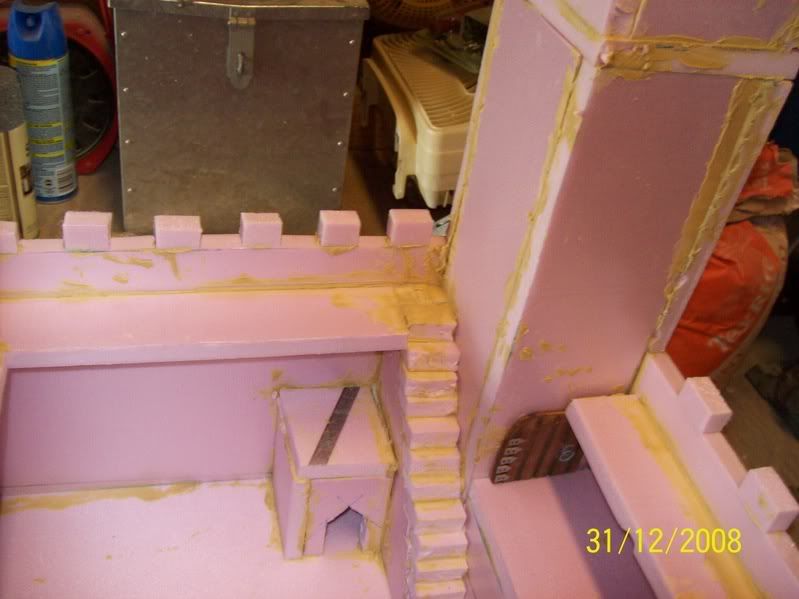
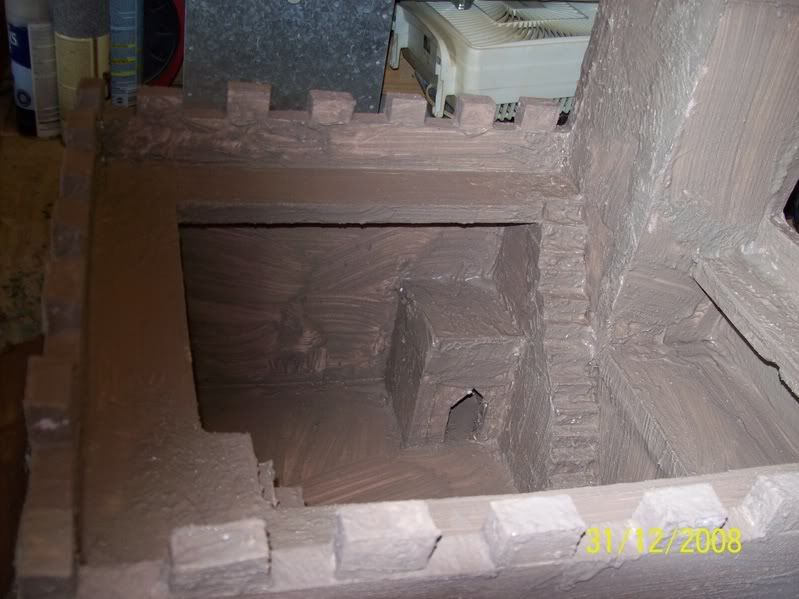
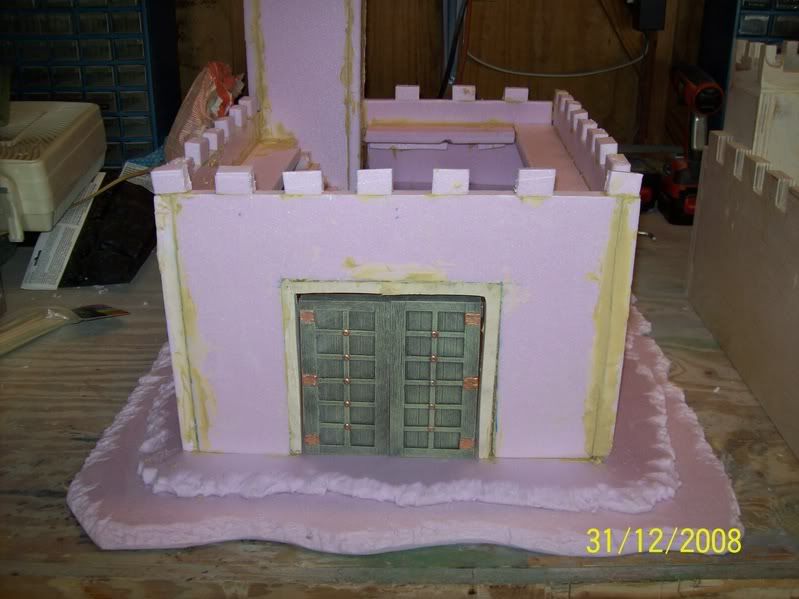
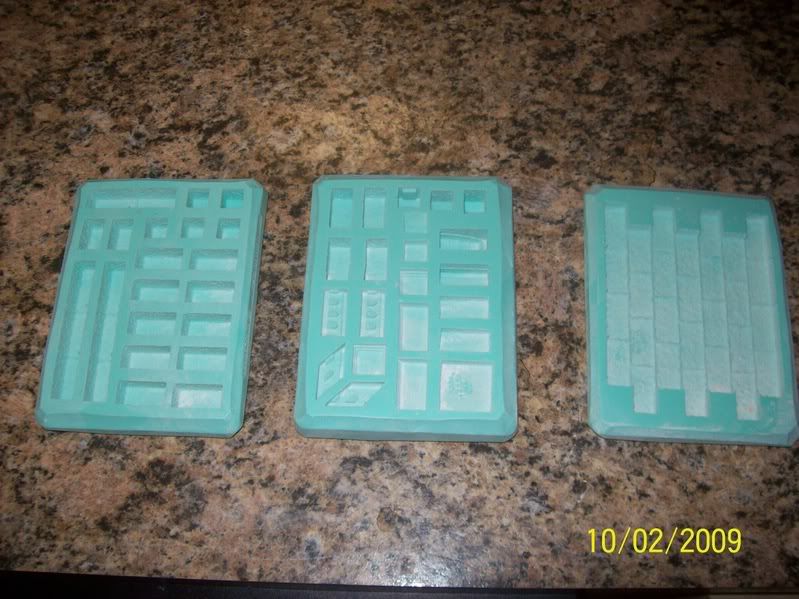
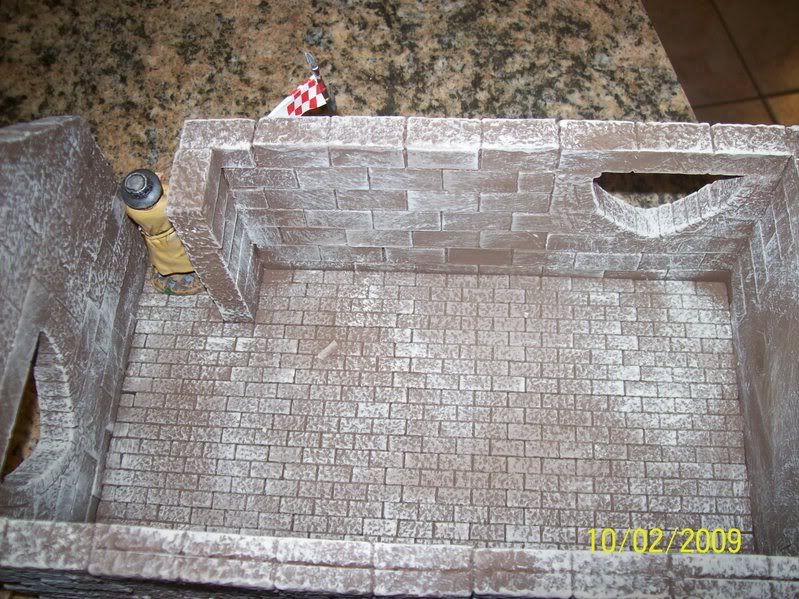
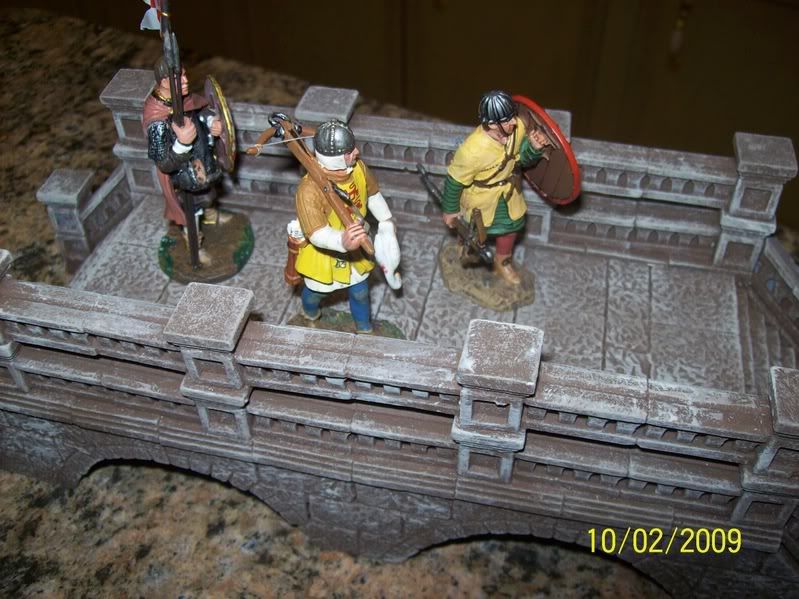
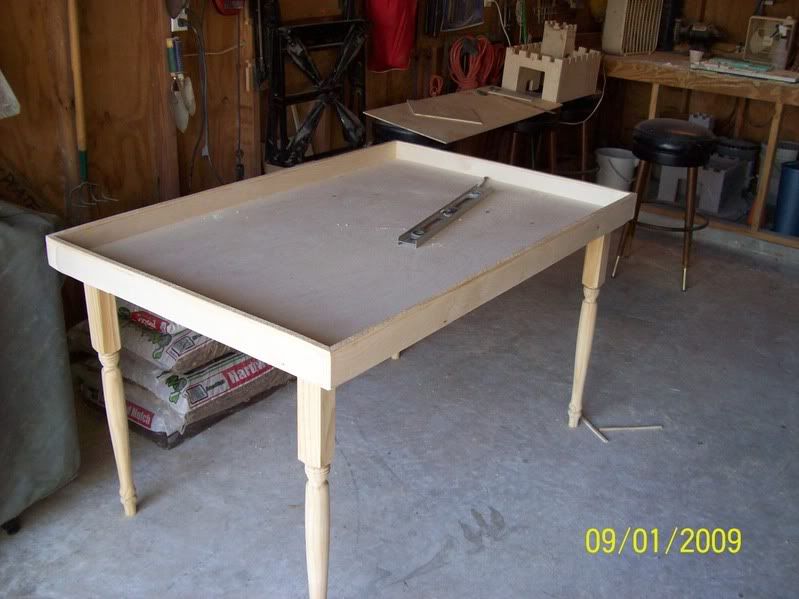
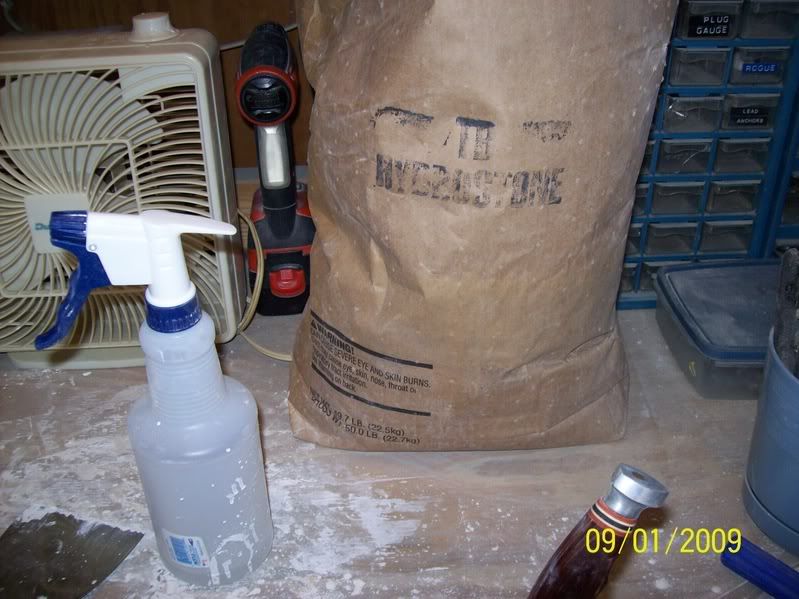
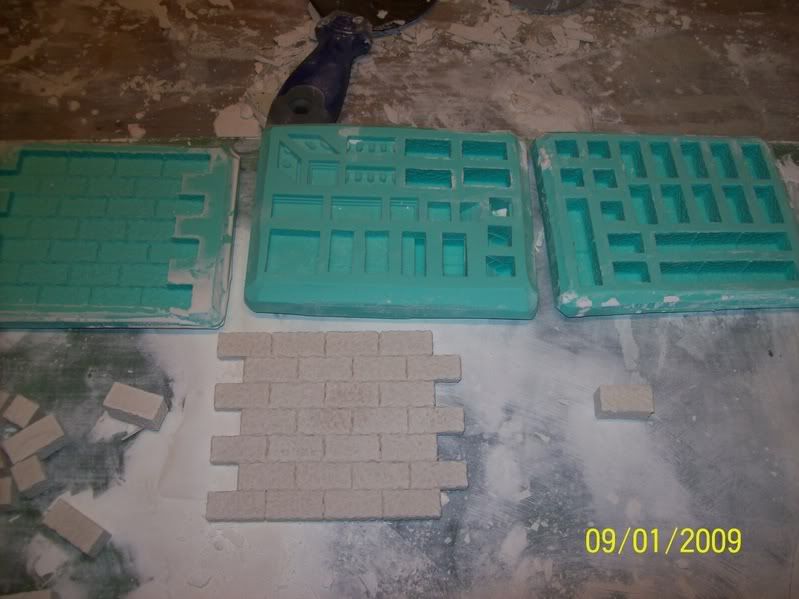
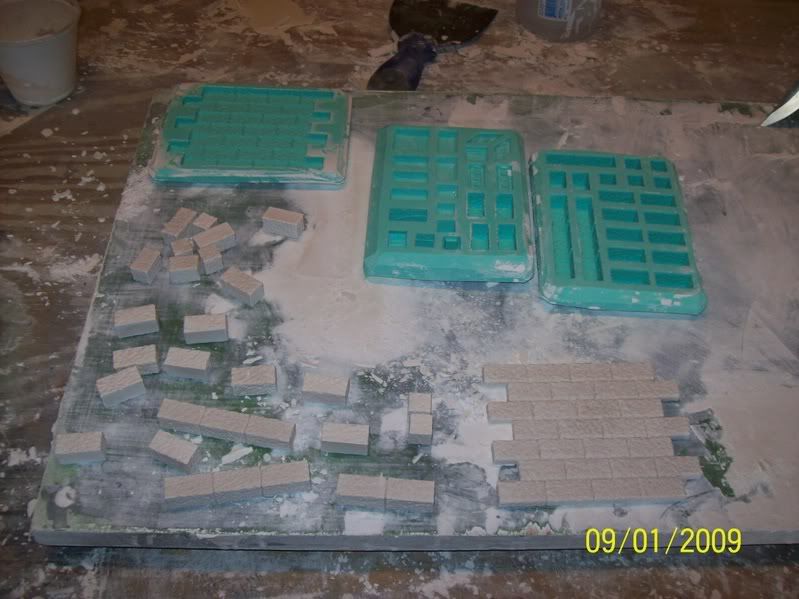
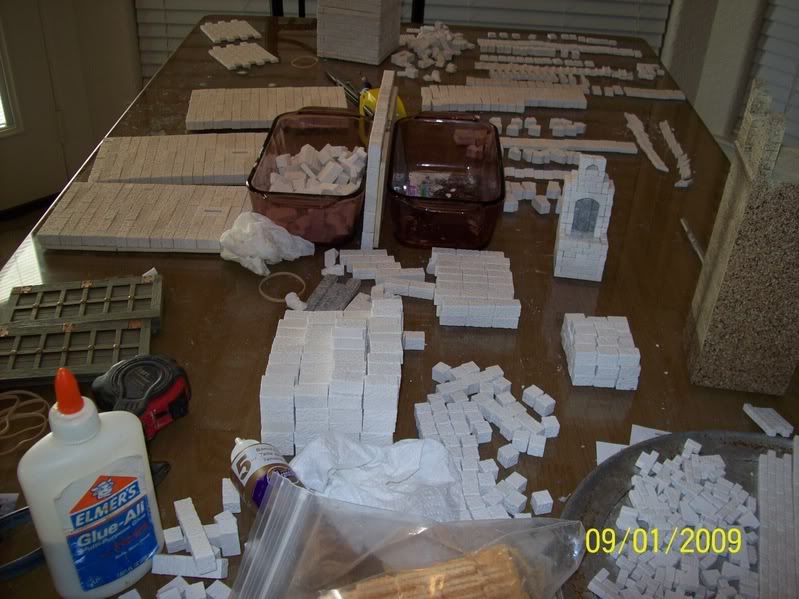
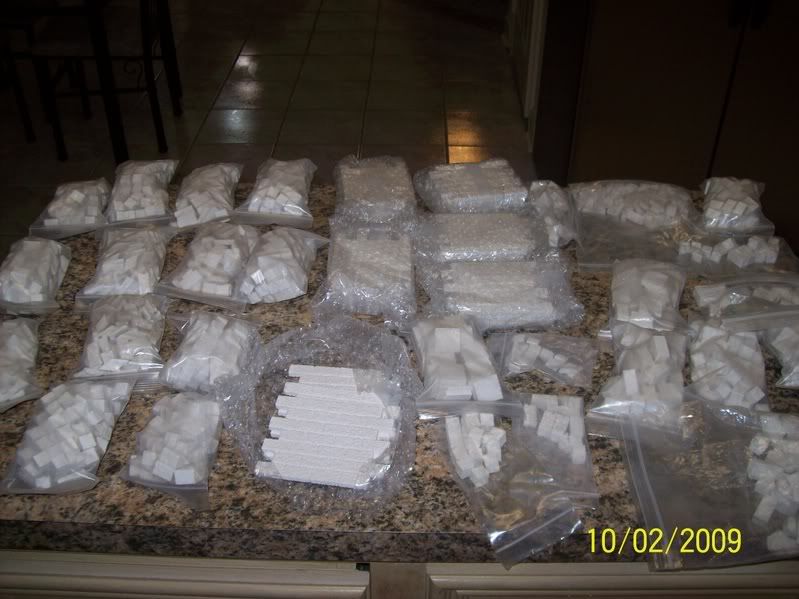
I have been working on building a scratch castle for 2 months now, first starting with wood, then trying styroprene and finally settling on Hirst Arts products.

The wood and the styroprene were failures in my opinion and scrapped, I’ll show them to you and explain why.

Both are discarded and on the trash or forgotten pile.

I have found that while I love viewing the finished products of all the talented hobbyist and modelers on here, that I mostly enjoy reading the tutorials, techniques, tricks and tips on how to make realistic dioramas. The directions on how they made their stuff look so real is what I like.

There is some fantastic talent on this forum. Some of the hobbyist on Treefrog can outdo the big companies when they put their mind to it.

Innovative ideas, creative work, fantastic painting and hours of work have turned out some of the best products I could have ever imagined by people on here.

I have nothing against “off the shelf” products. JG Miniatures, Pegasus, Build-A-Rama, Woodland Scenics, King and Country, just to name a few, are very realistic. I've bought their products and display them. We all have. It's hard to beat their products. I’m not comparing my work to theirs. Please don't get that impression. This is what they do for a living and they are good at it.

Some things, you just can’t build yourself as nicely, don’t have the time or the inclination to build it, can’t afford the price (they are expensive) or just buy it for convenience.

JG sells a fantastic castle, at $125.00 per wall and $125.00 per tower. Yes, there are deals, they do go on sale, but they are awful expensive if you want a castle with four towers and four walls. Not very practical for a large castle financially.

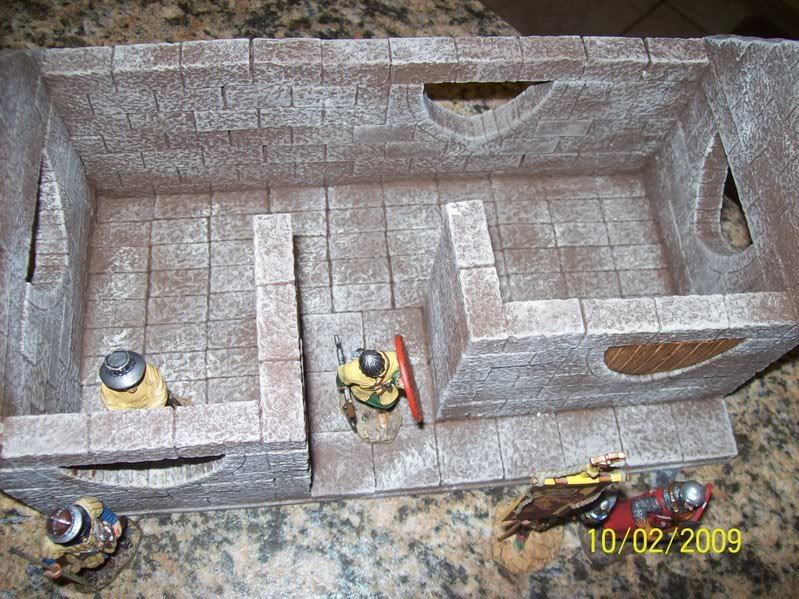
I found other companies that sell castles, mostly in 25-28mm for much less, but of course the scale was off for 60mm. I've seen prices that make JG Miniates look like a steal. I found some 54mm castles that were very nice, not cheap, but very nice. After researching these companies for weeks, I decided to try to build my own. I was very happy with my finished result, I’ll get to that later, but first I’m going to show you my errors and explain why.

I hope this information can help others if they decide to take on a project like this.
 
I love long posts !!! and also seeing what other people are upto. Looking forward to seeing your castle and all of your explanations as to what you have done. I didn't realise there was a castle at Rorkes Drift ? :D LOL


Scott
 
My errors.

My first castle attempt was from leftover scraps from sheets of mahogany and birch.

Those of you who know me, know that I had to rebuild from Hurricane Ike in Galveston, Texas.

I had some leftover wood from my new cabinets and had already started collecting the King and Country Crusader and Saracen series figures months ago. I can’t stand looking at leftover material in my garage, so the natural thing to do was to build.

Within a day or two, I had a castle built.

Not fantastic, raw and unfinished, no texturing or painting done yet, but a small scale castle that wasn’t too shabby. Somewhat proud of my efforts, the next step was to texture the walls.

I contacted Joe (The Lt.), and he told me my best bet was to contact Tim (fishhead19690) and Harold (fubar) for advice on this. Both were helpful, via telephone or email, sending me links and advice on texturing products. I also contacted Mike (mestell) on my own, because I love his JG Castle diorama. Thank you, Joe, Tim, Harold and Mike.

I’ve found out that there is no competitive attitude, jealousy, envy or contempt on this forum. There’s just a bunch of guys that are very willing and eager to help in any way they can. Everybody seems eager to give advice and input to a project. If you stop and listen, you can learn a lot.

I tried Celluclay, sanded grout, quick cement, plaster of paris and every mixed combination of each on the walls for texture. All were easy to work with but none were easy to scribe.

The Celluclay, broken off in chunks while scribing.

The sanded grout looked great, but you could rub the finish off with your fingers.

Quick cement worked the best, but was impossible to scribe.

Plaster of paris, what can I say, “you get what you pay for”, it’s messy, it dries quick, it chips when scribing, it’s not for me.

Any of these products would have worked, some better than others, but they all had their own flaws.

Not good products for wood, in my humble opinion.

Here are some photos of my first mistake, the wooden castle. It’s a shame too, cause this would have made a very sturdy castle.

000_0005.jpg


100_0428.jpg


100_0429.jpg


000_0001-1.jpg


000_0002-2.jpg
 
A great read so far Mike. I am looking forward to your entire tale. Your pictures of your first castle look like a success. I am anxious to read why you scraped it.

Mike
 
I'm going to enjoy this as people seem to come up with good ideas after a couple of tries,
Mark
 
More Errors

Okay, the wooden castle didn't work for me. It was very strong, very small, and I could literally stand on it or drop it on the floor with no damage. By the way, when I say stand on it, I’m not kidding, I’m 6’4”s tall and weigh 215 pounds. I could stand on it.

So for my next failure, I had seen a video on a website called Lizard-Landscapes.com.

Watch the video, the guy is kind of spacey and really into his pet lizard (iguana), but it’s a great tutorial.

The guy created a castle made of styroprene and sanded grout. It looked simple and was pretty nice. I had never worked with styrporene before, only styrofoam (which is very expensive in the hobby shops) and I just happened to have almost a full sheet of styroprene and lots of scraps laying around after the hurricane remodeling, so I was going to give it a try.

So far, the only thing I had invested in this project was my time (lots of it). I had all the leftover textures, wood and styroprene just sitting around the garage. I did have to purchase the Celluclay (very expensive, $22 a bag, but it lasts forever), but I can see where it might have several applications for any further projects. Mike (Mestell), had suggested trying Celluclay as a wall texture.

I carved a castle out in a couple of hours, cemented the pieces with liquid nails (which is very messy, but cheap and effective) and waited overnight to dry.

After it completely dried, like the video illustrated, I applied a mixture of sanded grout and was pleasantly surprised how easy it was to work with and how it looked. I knew it would need two or three coats to give it a good look , but was very excited about it.

The castle, made of styroprene was virtually weightless. I left it out in the sun to dry and when I checked on it later, the wind had blown it into my neighbors yard.

No damage done, the next day I applied another very heavy thick coat of sanded grout. Everything was looking good and I couldn’t wait to start scribing the walls.

His process of scribing the walls was by using a small hand held mold made of Sculpey, that you press into the semi dried grout. It leaves a decent impression but the grout has to be just the right texture. Too dry and it wont impress in it, too wet and it won’t impress into it, leaving a gooey mess. A very difficult process for me.

I made and baked a 4X6 inch Sculpey mold inscribed with little bricks patterns in it (used from very small wood squares, like his video).

Inscribing the thick layer of heavy dense grout was painstaickingly slow and tedious. I spent 8 hours doing it but it looked pretty good, well at least okay. The thick sanded grout gave a very nice texture.

I avoided it for two days, working on other things and after it had dried completely, the first thing I noticed, when I touched it, was how flimsy the sanded grout texture was. Just the slightest touch with my fingers rubbing it, and it would leave a bare spot. Bricks would literally rub off in your hand. A total failure.

I tried combinations of Celluclay, cement, plaster of paris and sanded grout. I know I had 30 pieces of wood samples on my garage floor, none I was happy with. The were either too hard to scribe, would rub off or chipped out when scribed with an exacto knife.

Frustrated, I put it on the ground a gave it a good kick.

Here are some photos of it.

000_0001.jpg


000_0001_00.jpg


000_0001_00.jpg


000_0003.jpg


000_0003_00.jpg


000_0005_00.jpg
 
Some more disasterous pictures!!!!

000_0006.jpg


000_0007_00.jpg


000_0002-1.jpg


By the way, this has long been hauled away by the City of Galveston Refuse Dept.
 
Hirst Arts

Thoroughly disgusted,

I turned my attention to these pre molded bricks you see on line all the time. Hirst Arts seems to have the market cornered on these and he makes a fantastic product. This guy is a genius. It’s very affordable and very easy to work with.

There are other brick and mold makers, but if you check out his website, you will be hooked. The “Tips and Tricks” section is by far the best tutorials I have ever seen. It’s not only about his bricks, there is a plethora of information on detailing anything and everything. From manufacturing your own pieces to complete floor plans for his structures.

I called Bruce Hirst immediately and he had shipped me 3 molds in just a couple of days.

I purchased mold # 40 his basic block mold for $34,
I purchased mold # 53 his bridge mold for $34,
and I purchased mold #200 his wall builder mold for $29.00.

100_0498.jpg


The photo shows them powdered for storage, my castle is completed now and he recommends powdering when storing.

Total with shipping was $103.00

His website is bruce@hirstarts.com and he seems like a very nice guy on the phone and is again extremely talented.

My only problem was that all his castles, buildings, bridges and structural plans are designed for 25-28mm, too small for me to use. I decided to cast my own bricks and see what I could come up with to fit a scale of 60mm.

In the meantime, I had contacted Ben Meyaard, his website is: ben@HigherGroundGames.com.

Ben produces single mold casts of Hirst products through a license agreement with Bruce.

He is just the coolest and easiest guy to work with I have ever met. He was genuinely interested in helping me design something for 60mm and even called me occasionally to check on my progress. If you decide to undertake a project like this, I highly recommend Ben for the personal attention he gives his customers.

Ben’s number is 317-750-5569, he would gladly appreciate your inquiry.

I ordered several wall sections from Ben and some assorted pieces. He was also kind enough to send me tons of free samples to try out. A very nice guy and so easy to work with, again I highly recommend him. If you call him, mention my name (Michael Miller) and the great service he gave me.
 
Mike,
TWO perfectly good castles already! Waiting for the really, really good one.
Great thread with nice info and pics!
Mike
 
I HAVE MOLDS!

Okay, so my molds have arrived and I’ve purchased a product called Hydrostone TB.

Hydrostone TB is a strong gypsum cement that when dried has a psi of over10,000. It is mostly for commercial use but is also very popular with castings, molds and figurines.

I got a 50 pound bag for $16.00 in Houston, Texas at Porter Warner Industries. I did not count the molds that I have already made, but I’m half way through my third bag and have thousands of blocks left after finishing my castle, a couple of extra buildings, a bridge, a stove and 3 additional towers that I scrapped. That is a $48.00 investment that will make more blocks than you will know what to do with.

A few photos made from leftover blocks,

100_0525.jpg


100_0531.jpg


100_0521.jpg


100_0500.jpg


100_0511.jpg


Very inexpensive and very easy to work with. Simply mix with water. The complete instructions, with videos for mixing, pouring, scraping, etc…, are on Bruce’s website. I will not bore you with the casting process because his directions are just too easy to follow and my directions would not do you justice. If I can do it, anybody can do it.

A mold takes about 35-45 minutes to reproduce, depending on the viscosity of the mix and the temperature of the room. I did mine in the garage and when we got a cold snap in the weather, they seemed to take longer to harden.

I used no mixing ratio formula, I just mixed it with water until it reached a pancake batter consistency and poured.

I did use his “wet water” method and can’t see an air bubble in any single piece I’ve made.

I really recommend the Hirst Arts products, very easy to work with and you can let your mind flow. My trouble was every time I made something, I thought of something better I could do, so I re-did it.

In the meantime, waiting for molds to set, I made my diorama table. It’s the same dimensions as my Zulu table, but I stained it a rich dark color.

000_0004-1.jpg


It came out pretty good, I changed the wood trim to a “gothic” looking trim I found at Home Depot.
 
Back to the molds.

Here are some photos of the 3 molds I purchased and the Hydrostone TB.

000_0006-1.jpg


000_0007.jpg


000_0005-1.jpg


000_0001-2.jpg


You would not believe how many bricks I have left over after doing this.

100_0535.jpg


I've collected over 100 King and Country, Del Prado and Frontline Crusaders and Saracen figures. Because of the size of my castle, my collection quickly outgrew my table. I've squeezed in a river for my bridge, built a gallows for undisciplined soldiers, finished my palm trees and am ready to set it up. Give me a couple of days and I'll put the soldiers in place and submit.

If you've viewed this, thank you, I hope you enjoy, Michael
 
That's great Mike.I can't wait to see your diorama.
Mark
 
Michael, I am very very impressed with what you are doing. Absolutely brilliant! Finding those molds and using the hydrostone really has some great visual appeal. Kudos!

Mike
 
Mike,

I'm impressed with both your skill and enthusiasm for your project. I think that many of us would have opted not to have shown our “previous” attempts at all. I am looking forward to seeing the next stage.

Jeff

Btw, you mentioned your Zulu table, any chance of a photo?
 
Great job! Realy amazing work you have going on there. I look forward to see the final result!
 
WOW very nice, I am anxious to see the final project.
 
This is a great thread Mike, personally I though the first two buildings were very good and had the makings of becoming very nice dio pieces. Gave me a chuckle when you said it blew into the neighbours yard and then you gave it a good kick. LOL :D

These plaster blocks though have turned out to be fantastic. How big is each block though compared to a figure. I wouldn't mind having a stab at making some of these and using to make some facades. There was a company in the UK that used to sell something similar (already cast though) for 1:32 and also for OO/HO scale. He folded his business but I think an American firm bought the rights to the moulds and now sell them. For the life of me I can't find the link or remember their name. I will keep hunting. I do remember the moulds were not cheap.

Thanks and looking forward to seeing more of this great dio.


Scott
 

Users who are viewing this thread

Back
Top