You are using an out of date browser. It may not display this or other websites correctly.
You should upgrade or use an alternative browser.
You should upgrade or use an alternative browser.
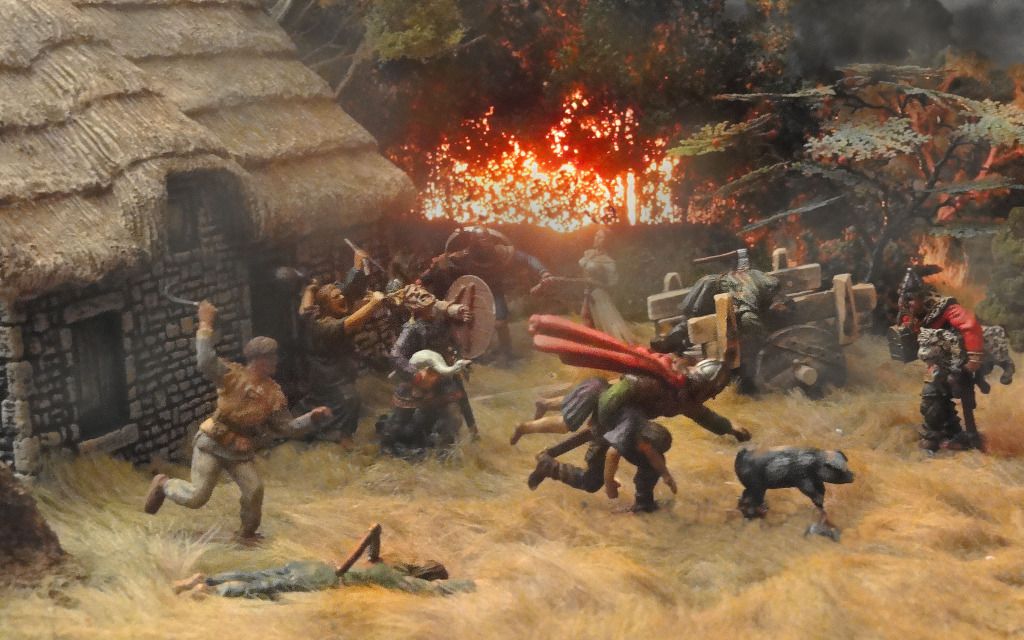
Saxon village under attack from viking raiders (1 Viewer)
- Thread starter sapper
- Start date
sapper
Sergeant First Class
- Joined
- Mar 2, 2014
- Messages
- 1,070
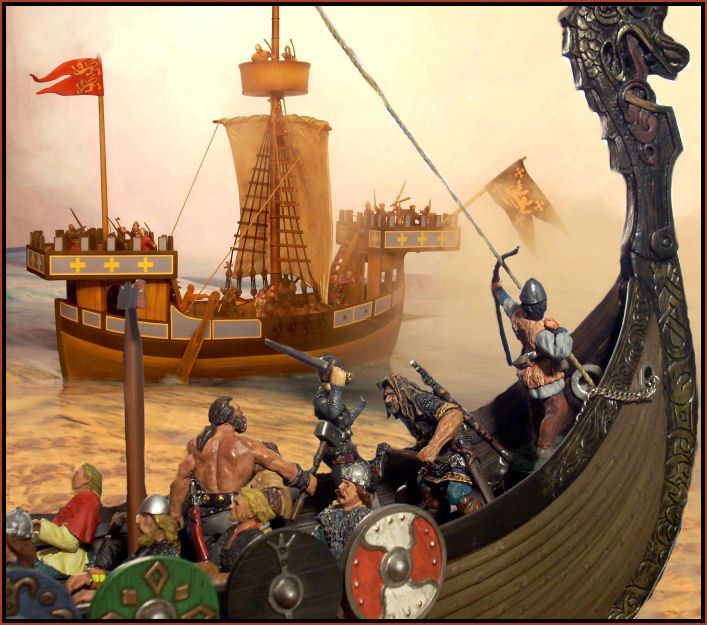
Hello all, i have completed water pour which took more than one bottle as i put two coatings on. One of photos shows grooves for the keels of the ships. I will put a solution around the ship sailing in, to create a white foam look. For this i will use some Water Effects from Woodland Scenics and mix some white paint in. More work needs to be done on the ships and some shrubs and foliage added. Also need to put some more detail into some areas. I hope you like the progresss. Regards Greg.


wayne556517
Lieutenant General
- Joined
- Aug 28, 2007
- Messages
- 16,920
Looking real good mate and the water looks great.
Ivanhoe
Sergeant First Class
- Joined
- Jun 24, 2015
- Messages
- 1,182
Hello all, i have completed water pour which took more than one bottle as i put two coatings on. One of photos shows grooves for the keels of the ships. I will put a solution around the ship sailing in, to create a white foam look. For this i will use some Water Effects from Woodland Scenics and mix some white paint in. More work needs to be done on the ships and some shrubs and foliage added. Also need to put some more detail into some areas. I hope you like the progresss. Regards Greg.
Impressive !
So many details to see and enjoy.
Looks like your idea for the keels in the water turned out...
A great deal of effort.
Thank you.
farmertony
Corporal
- Joined
- Aug 4, 2013
- Messages
- 489
Well, the water looks good to me.This whole diorama is going to look great.Well done.
playsetaddict
Sergeant
- Joined
- Sep 22, 2006
- Messages
- 655
Where did the ships come from? They look nice.
sapper
Sergeant First Class
- Joined
- Mar 2, 2014
- Messages
- 1,070
Thankyou Playseaddict, Tony, Steve, Ivanhoe, Tom, Wayne and Andanna for your comments and keeping an interest in the diorama. I would like to think it is about 75% complete with more work to be done on the ships and landscaping and more figures to be placed. The ships were bought on ebay under models and kits, then type in boats and ships and then type in viking. The ships are named Wooden Viking Drakkar 24". I had to do lots of modifications to make them suitable like making the shields and seating bigger and reducing the numbers for those down. Hope you all stay with the project till the end Regards Greg.
playsetaddict
Sergeant
- Joined
- Sep 22, 2006
- Messages
- 655
Thankyou Playseaddict, Tony, Steve, Ivanhoe, Tom, Wayne and Andanna for your comments and keeping an interest in the diorama. I would like to think it is about 75% complete with more work to be done on the ships and landscaping and more figures to be placed. The ships were bought on ebay under models and kits, then type in boats and ships and then type in viking. The ships are named Wooden Viking Drakkar 24". I had to do lots of modifications to make them suitable like making the shields and seating bigger and reducing the numbers for those down. Hope you all stay with the project till the end Regards Greg.
I've been watching those ships on eBay and wondering how they would work with 54-60mm figures. The price sure looks good if they will work. May I ask how you made new shields? You got them to match the Russian Viking figures' shields perfectly. I've been thinking of doing a similar project to yours, though not nearly as ingeniously scratch built.


sapper
Sergeant First Class
- Joined
- Mar 2, 2014
- Messages
- 1,070
Hello Playsetaddict, love the pictures you posted. One could get lots of ideas from those scenes. The ships require a fair bit of work to make them compatible with 54-60 mm figures but will work out well when completed. My last photos showed them with work still to be done but next post they should be finished. The shields are made from steel washers purchased from a nuts and bolts store that had the size i wanted. The middle of the shield is the head of a screw with the srcew hole filled in with solder and the shaft of the screw cut off. This was then glued onto the washer that had been primed and painted. I will post some photos of the parts next time to make it more understandable. I made the seating larger by joining two seats together using wood. When i did this, i then had to change the position of the oar holes. Old holes will be filled in with wood filler, sanded and painted. So you can appreciate the work gone into it but i think it is well and truely worth it. Until next time Regards Greg.
playsetaddict
Sergeant
- Joined
- Sep 22, 2006
- Messages
- 655
Hello Playsetaddict, love the pictures you posted. One could get lots of ideas from those scenes. The ships require a fair bit of work to make them compatible with 54-60 mm figures but will work out well when completed. My last photos showed them with work still to be done but next post they should be finished. The shields are made from steel washers purchased from a nuts and bolts store that had the size i wanted. The middle of the shield is the head of a screw with the srcew hole filled in with solder and the shaft of the screw cut off. This was then glued onto the washer that had been primed and painted. I will post some photos of the parts next time to make it more understandable. I made the seating larger by joining two seats together using wood. When i did this, i then had to change the position of the oar holes. Old holes will be filled in with wood filler, sanded and painted. So you can appreciate the work gone into it but i think it is well and truely worth it. Until next time Regards Greg.
I appreciate the info. I didn't think the ships even had seats when I looked at the pictures on line.
You're doing some amazing things in this dio. I admire your ability to scratch build your buildings. And no one has commented on your use of the Russian Viking figures. Did you paint them all? I've been plotting getting those castings and have been amazed at how many poses are out there. Your set up shows how they work size-wise with other figures. I appreciate that. Thanks.
Joe
villagehorse
Lieutenant General
- Joined
- Feb 5, 2010
- Messages
- 16,554
Really like the fire aspect, just highlights your amazing work. Robin.
sapper
Sergeant First Class
- Joined
- Mar 2, 2014
- Messages
- 1,070
Thanks for viewing the diorama Robin and for your continued support over the last year with other projects. I will also thank the other forum members for their likes and staying with the diorama. Now getting back to you Joe and your comments and question. Firstly, the Russian figures have been a great aquisition for me as i find them to have a variety of interesting poses, nicely sculptured and a good price. I have only bought three unpainted figures and i managed to do a reasonable painting job with these. The rest i have found to be well painted. One thing i have found is some variation in size between the figures as they are sold at 54 mm but some are bigger than W.Brittains figures. When i buy them, i try not to purchase anything above 50 aussie dollars but most have cost about 30 dollars. That is cheap when you see the same figure probably better painted but selling for over 100 dollars. I'm happy with them and thats the main thing for me. Until next time Regards Greg.
END TIMES
Specialist
- Joined
- Sep 19, 2010
- Messages
- 276
Thanks for sharing Sapper, I am planning on trying something like this in the future. I like the scratch built stockade and buildings, did you use teddy bear fur for the roofs? Right now I am gathering some figures, buildings, ships, and other things. Plus getting some painted metal figures, plus going to paint some plastic and metal ones too. Still a novice at building things, but I can paint. I am going to try converting some figures and sculpt some ones too(or at least try) {sm2}. Going to be a long term project, but your work keeps me driving forward. Thanks again, Mike.
sapper
Sergeant First Class
- Joined
- Mar 2, 2014
- Messages
- 1,070
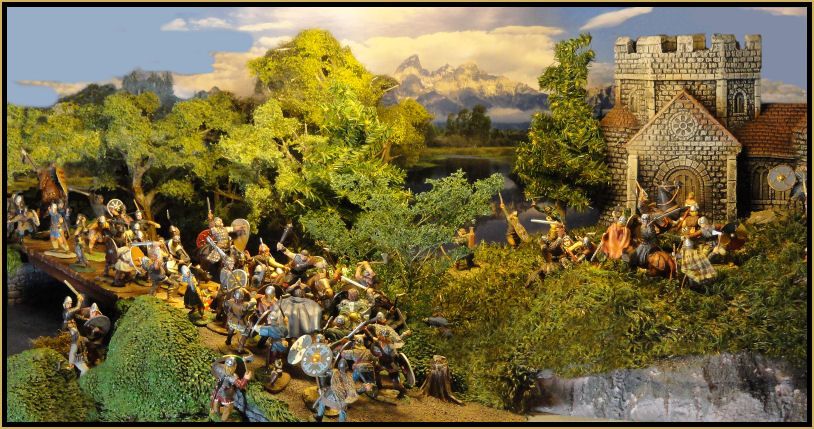
You sound like you have a real interest in the vikings as well, Mike. My next post this coming weekend will have most of the diorama done and probably another one after that to complete. I have finished work on my ships and the foamed water around them. The church yard is complete with some nice figures placed and the landscaping is finished. There will also be some instruction on how i did the shields. I think it's looking good but i'm biased. Regards Greg.
Last edited:
Users who are viewing this thread
Total: 2 (members: 0, guests: 2)

