kilted vampire
Lieutenant Colonel
- Joined
- Mar 2, 2006
- Messages
- 7,900
All in favor of making Michael er I mean Simon an honourary Michael say "Aye"
"Aye!"
"Aye!"

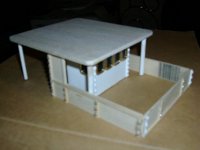
Looks really good, Mike! Your finish on the decking fooled my eye, until I read your description. Honestly, I thought you had salvaged a piece of wood from a school desk chair or some similar source, it looks so smooth and uniform. A really great project.
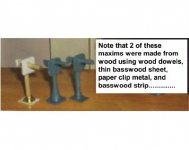
I may have missed this in an earlier post-what did you use to make the boilers at the aft end of the deck?
Prost!
Brad
All in favor of making Michael er I mean Simon an honourary Michael say "Aye"
"Aye!"
AYE, but only after he pays the usual $300 fee for change of surname..Michael

Am a little embarassed...Never discard those cardboard rolls, after the paper is all used up..You just never know what they might be needed for, in the fertile mind of a crafty type of person........Michael
AYE, but only after he pays the usual $300 fee for change of surname..Michael
I've only got $200 in cash, so I'm thinking perhaps 'Smike', until I can raise the extra $100?
Michael,
This beautiful beast is coming along very nicely! I can't wait to be invited onboard for the maiden voyage.
Mike
PS-Have you looked into Dorset stuff to see what they have for figures?
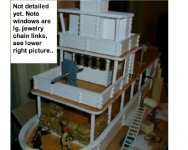
This is your best boat yet Michael. I love the detail you have on this one. Any way to make the pictures larger? I had a hard time making out your guns. They look nice from what I can see.


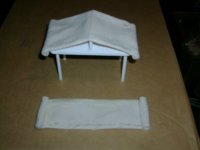
Some craft stores have a domestics dept. with different cloth on rolls..I found a canvas looking piece and bought some. To make my awnings, I create a wooden form as a support base. I then cut a square or rectangle section, making it a little bit larger then the form..Because this material will fray, I fold up and glue down opposite ends of the cloth equal to the length of the form. Folding the cloth in half, I drape over the roof of the form and glue to the peak of the form...I take a small dowel and glue it to the open, unfolded ends. I start rolling these ends, keeping everything tight and when I reach the wood form, I secure the roll with glue. Repeat for the other end..