Ref:
Arnhem - 1944: The Airborne Battle by M. Middlebrook
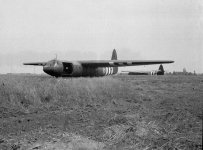
That left only one of the four gliders with these RAF loads to land safely. It also came down on that part of the landing zone which was under German fire.

There was no one to help the occupants unload the heavy packing cases, and there were no vehicles to carry the equipment away even if it could be unloaded.

The senior glider pilot, Staff Sergeant John Kennedy, and the RAF officer in charge, Flight Lieutenant Richards, decided to destroy the load by placing explosive charges among it. So that ill-starred venture produced absolutely nothing.

Even if all four gliders carrying radar warning units had landed safely, or just two with sufficient equipment to produce one radar unit, there was no reception party with vehicles waiting for them, and the equipment would have had to be abandoned on a landing zone that was about to be evacuated by friendly troops. The wounded glider pilots and some of the RAF men obtained a lift on a passing jeep; the remainder set off on foot to find Divisional HQ.
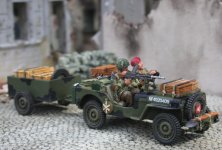
There were no serious unloading problems for most of the gliders, and all but one was safely emptied by 5.30 p.m. The resupply operation by glider had mostly been successful. Three Hamilcars heavily loaded with trailers full of ammunition had been dispatched as an experiment; two were unloaded, but the Germans captured the third before it could be emptied. Horsa gliders had brought in fifteen jeeps, each with two trailers full of ammunition for the air landing battalions; and an RASC light transport platoon of eighteen jeeps and trailers had also been sent; so each brigade could have a reserve ammunition column.

The five Polish anti-tank guns landed safely and were driven to Divisional HQ, the Poles hoping that they could join up with their own brigade, due in on the following morning.
The actual glider landing, even under fire at one place, appears to have cost the lives of only eight men: four glider pilots, two artillerymen, one REME jeep driver and a 10th Battalion man travelling with one of his unit's jeeps.
The RAF tug aircraft flew home safely, having lost only one Stirling but with thirty aircraft damaged by flak. One Dakota, flown by Flying Officer Ron McTeare of 575 Squadron, returned to England with a heavy glider tow rope wrapped around its starboard wing. Flying Officer Frank Gee, the second pilot, describes this:
“There was the sound of a very large 'thwack', the same sound as when you hit a car rubber mat against a wall, and the whole aircraft shuddered from stem to stern. On looking out of my window I saw that wrapped around the starboard wing was a tow rope dropped by another aircraft. The double ends that affix to the glider blotted out any aileron control, and the single shackle that affixes to the tug was trailing out some 300 feet behind”.
The two pilots managed to reach England and land at Framlingham, the first airfield they could find with an open approach. The heavy tug shackle tore up thirty yards of concrete
'as if it were cardboard'.
There was one more element of the air operation. The parachute resupply for this day had been sent in thirty-three Stirlings from Harwell. Their loads were 803 panniers or containers loaded with
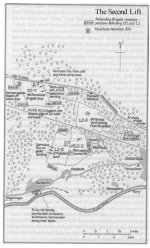
eighty-six tons of supplies, mostly gun and mortar ammunition, with some petrol, but no food. These were to be parachuted on LZ-L, an open space in the woods north-west of Oosterbeek (see map, above).
One Stirling had turned back; one had been shot down earlier in the flight; the remaining thirty-one flew in just after the glider landing and released their supplies. RASC jeeps and trailers went out to collect these supplies. This supply drop was another element of the plans made under the assumption that there would be little opposition; the area chosen was not yet fully under British control and
only twelve tons of the supplies were gathered in.
One Stirling, a 570 Squadron aircraft, was hit by flak and later crashed near Nijmegen, the third aircraft from that squadron to be lost that day. That made ten aircraft - six American and four RAF — lost from the Arnhem lift.

Arnhem was starting to become costly for the air units, and the poor collection of supplies on the ground was a portent of difficulties to come. A signal was sent to England urging that the next day's supply drop should be made close to the Hartenstein at Oosterbeek, which was securely in British hands.
So ended the second lift and now that the 1st British Airborne Division was complete, so in theory, it could gather itself in from those exposed landing areas and concentrate all of its effort to getting into Arnhem.


