
You are using an out of date browser. It may not display this or other websites correctly.
You should upgrade or use an alternative browser.
You should upgrade or use an alternative browser.
Factory Complex (1 Viewer)
- Thread starter fmethorst
- Start date
Louis Badolato
Lieutenant General
- Joined
- Apr 25, 2005
- Messages
- 18,483
This is just amazing to be able to watch your progress. Just jaw dropping creativity and outstanding artistic talent.
Mike
I'm with Mike. Just amazing work, Frank!:salute::
bradleyl30
Command Sergeant Major
- Joined
- Oct 17, 2012
- Messages
- 2,582
Wow, I am so impressed. Really inspirational to see all the work and craft involved.
Desertkiwi
1st Lieutenant
- Joined
- Oct 3, 2009
- Messages
- 4,999
Absolute joy to seeing how this project is slowly coming together. Amazing skills!
Thank you for sharing! :salute::
Thank you for sharing! :salute::
fmethorst
Command Sergeant Major
- Joined
- Feb 18, 2008
- Messages
- 2,497
I wanted to break up the dirt areas so they didn't appear so uniform. We tried combinations of different materials including the ultra fine dirt I apply to my models as weathering and various sizes of sand. None of it looked good. In the end we took advantage of some of the unevenness in the CelluClay and simply painted in rocks. This gives a much better embedded rock look.


Priming and painting the ribbed seam metal roofing


The team came up with the idea of using paper clips for door handles. They will be painted and weathered.


Priming and painting the ribbed seam metal roofing


The team came up with the idea of using paper clips for door handles. They will be painted and weathered.


Louis Badolato
Lieutenant General
- Joined
- Apr 25, 2005
- Messages
- 18,483
Frank,
Any updates? :salute::
Any updates? :salute::
Artillery_crazy
2nd Lieutenant
- Joined
- Jun 14, 2008
- Messages
- 3,536
Wow!! This is really hightech.....congratulations on all the hardware....
Cheers
A_C
Cheers
A_C
Cutting out the "glass" for the windows. We used 0.005" clear styrene for the glass and cut it on the Cricut


fmethorst
Command Sergeant Major
- Joined
- Feb 18, 2008
- Messages
- 2,497
Hi all, we've been away for awhile enjoying the summer as best we can, but now the dio elves are back at it.
We've done a bunch of work on the factory work halls.
One of the challenges we had was how to do the brick work on the buildings. Trying to carve and paint 1/30 scale bricks was not realistic so I ordered some 1/32 scale brickwork paper off of Etsy. It's interesting, as it has a rough texture which helps to give the wall a more 3 dimensional look. I'm quite happy with the outcome.
It should ne noted that we encountered a lot of warpage of the foam core when gluing anything to it. It is highly sensitive to moisture. This was true for the balsa as well. The resolution to this problem was to apply moisture to the opposite side and flatten the items with weights. In the case of the foam core walls, we applied white paper on the inside wall at the same time the brick was applied to the outside. These cancelled each other out.


At the same time we added weathering to the roof


There was a LOT of wall and "brick" paper was limited.


We've done a bunch of work on the factory work halls.
One of the challenges we had was how to do the brick work on the buildings. Trying to carve and paint 1/30 scale bricks was not realistic so I ordered some 1/32 scale brickwork paper off of Etsy. It's interesting, as it has a rough texture which helps to give the wall a more 3 dimensional look. I'm quite happy with the outcome.
It should ne noted that we encountered a lot of warpage of the foam core when gluing anything to it. It is highly sensitive to moisture. This was true for the balsa as well. The resolution to this problem was to apply moisture to the opposite side and flatten the items with weights. In the case of the foam core walls, we applied white paper on the inside wall at the same time the brick was applied to the outside. These cancelled each other out.
At the same time we added weathering to the roof
There was a LOT of wall and "brick" paper was limited.
fmethorst
Command Sergeant Major
- Joined
- Feb 18, 2008
- Messages
- 2,497
As you can see from the pictures, the "glass" in the windows is way too clean for a dirty old factory. After some experimentation, we settled on white glue thinned with rubbing alcohol. We also found cleaning the clear plastic with alcohol prior to applying the glue provided better results as it removed any oils that can result in a blotchy application.


At the same time we applied weathering to the brick work and girders


We then cracked and broke some of the windows panes


At the same time we applied weathering to the brick work and girders
We then cracked and broke some of the windows panes


villagehorse
Lieutenant General
- Joined
- Feb 5, 2010
- Messages
- 17,022
Can envisage a war production line going on this superb factory. Robin.
29 Let's Go
Sergeant Major
- Joined
- Mar 13, 2011
- Messages
- 1,945
Frank,
What You all are producing is just fantastic.
Steve
What You all are producing is just fantastic.
Steve
Louis Badolato
Lieutenant General
- Joined
- Apr 25, 2005
- Messages
- 18,483
Frank,
What You all are producing is just fantastic.
Steve
I couldn't agree more!:salute::
fmethorst
Command Sergeant Major
- Joined
- Feb 18, 2008
- Messages
- 2,497
Thanks guys
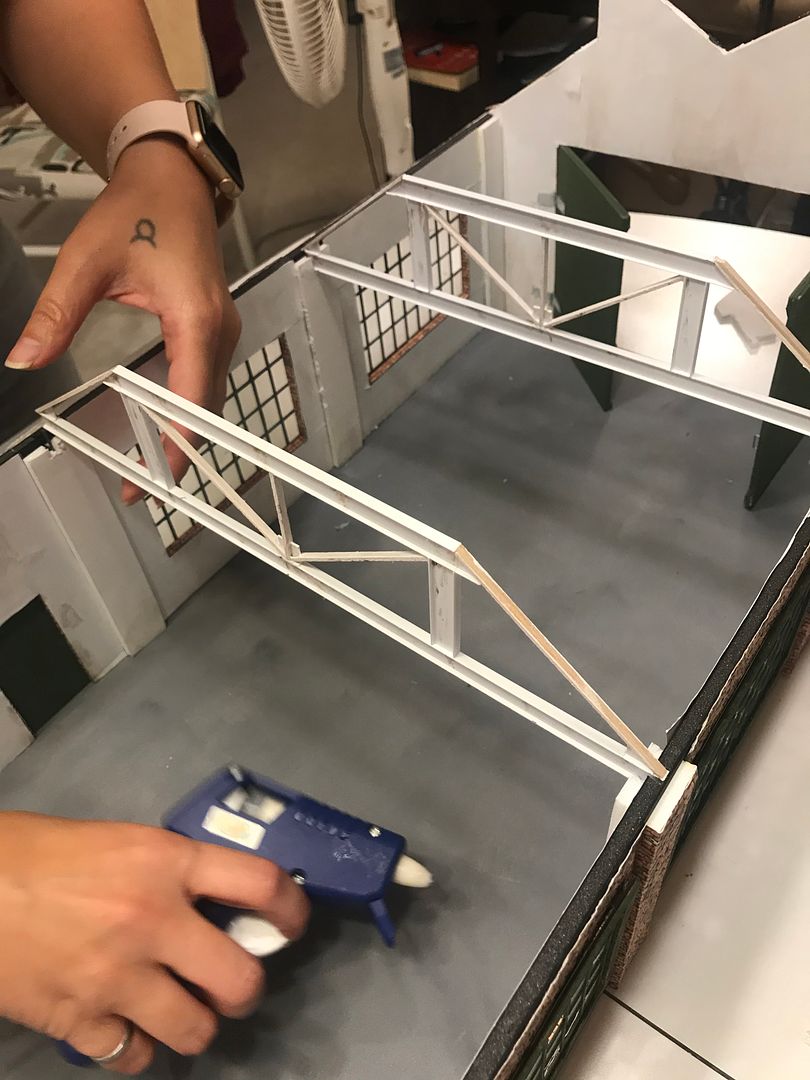
Assembly building 1
The tolerances for our scratch built pieces is quite high so fitting everything together proved challenging. I don't have the styrene for the upper row of windows yet.


scratch built hinges made from tin can.


Roof trusses


Assembly building 1
The tolerances for our scratch built pieces is quite high so fitting everything together proved challenging. I don't have the styrene for the upper row of windows yet.
scratch built hinges made from tin can.
Roof trusses


villagehorse
Lieutenant General
- Joined
- Feb 5, 2010
- Messages
- 17,022
Just another example of how vehicles and figures bring a diorama to life. The factory is nailed. Interior fit out very tempting to bring the factory into life. So good. Robin.
Louis Badolato
Lieutenant General
- Joined
- Apr 25, 2005
- Messages
- 18,483
Frank,
I am just gobsmacked!!:salute:: On a scale of 1-10, your diorama is about a 37!!
I am just gobsmacked!!:salute:: On a scale of 1-10, your diorama is about a 37!!
wayne556517
Lieutenant General
- Joined
- Aug 28, 2007
- Messages
- 17,060
Brilliant Frank it came out perfect so looking forward to this being done.
Users who are viewing this thread
Total: 2 (members: 0, guests: 2)